Intro
When we create a WebApi project in .NET Core or in any other language, we intend that other applications, services or even bots, use the created endpoints and consume their responses using HTTP or any other protocol.
It’s extremely important that your API is well documented, because who’ll consume it will need to know how to input parameters and how to interpret the responses of each endpoint, especially if your API is consumed via Web. Nowadays, there’s some ways to automate and speed up this documentation, and I’ll present one of them, which is Swagger.
Swagger is a open-source framework that contains several tools that helps developers to modelling, build and document REST APIs. In this guide I’ll show a documentation example through Nuget package: Swashbuckle
Example .NET Core + Swashbuckle
In this article I’ll use only vscode and integrated terminal. If you don’t know how to configure a .NET Core development environment, you can check my other post.
If you are using Windows, I strongly suggest you configure vscode’s integrated terminal to git-bash, using my other post.
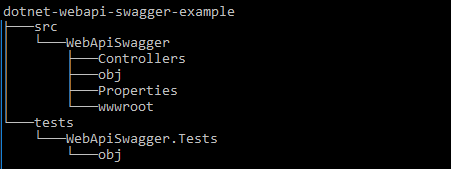
Project Structure
I will use a project structure, that I use in all my .NET Core projects, and it’s like:
First thing to do is to create a directory to nest your WebApi project, to do so, I suggest you to create a “projects” directory inside the home folder of your user. Open vscode and then open the integrated terminal (ctrl+’), type the following:
1
mkdir ~/projects
After, navigate to projects directory and create a directory for the WebApi project itself:
1
2
cd ~/projects
mkdir dotnet-web-api-swagger-example
Note: to create all at once use -p with full path:
1
mkdir -p ~/projects/dotnet-webapi-swagger-example
Now we will create the solution, execute the commands:
1
2
cd ~/projects dotnet-webapi-swagger-example
dotnet new sln --name WebApiSwagger
Then create the WebApi project. Don’t forget the Unit Tests project:
1
2
dotnet new webapi -o src/WebApiSwagger
dotnet new xunit -o tests/WebApiSwagger.Tests
It is necessary to add these two new projects to the previously created solution:
1
2
dotnet sln add src/WebApiSwagger/WebApiSwagger.csproj
dotnet sln add tests/WebApiSwagger.Tests/WebApiSwagger.Tests.csproj
Now it’s just open the directory “dotnet-webapi-swagger-example” in vscode:
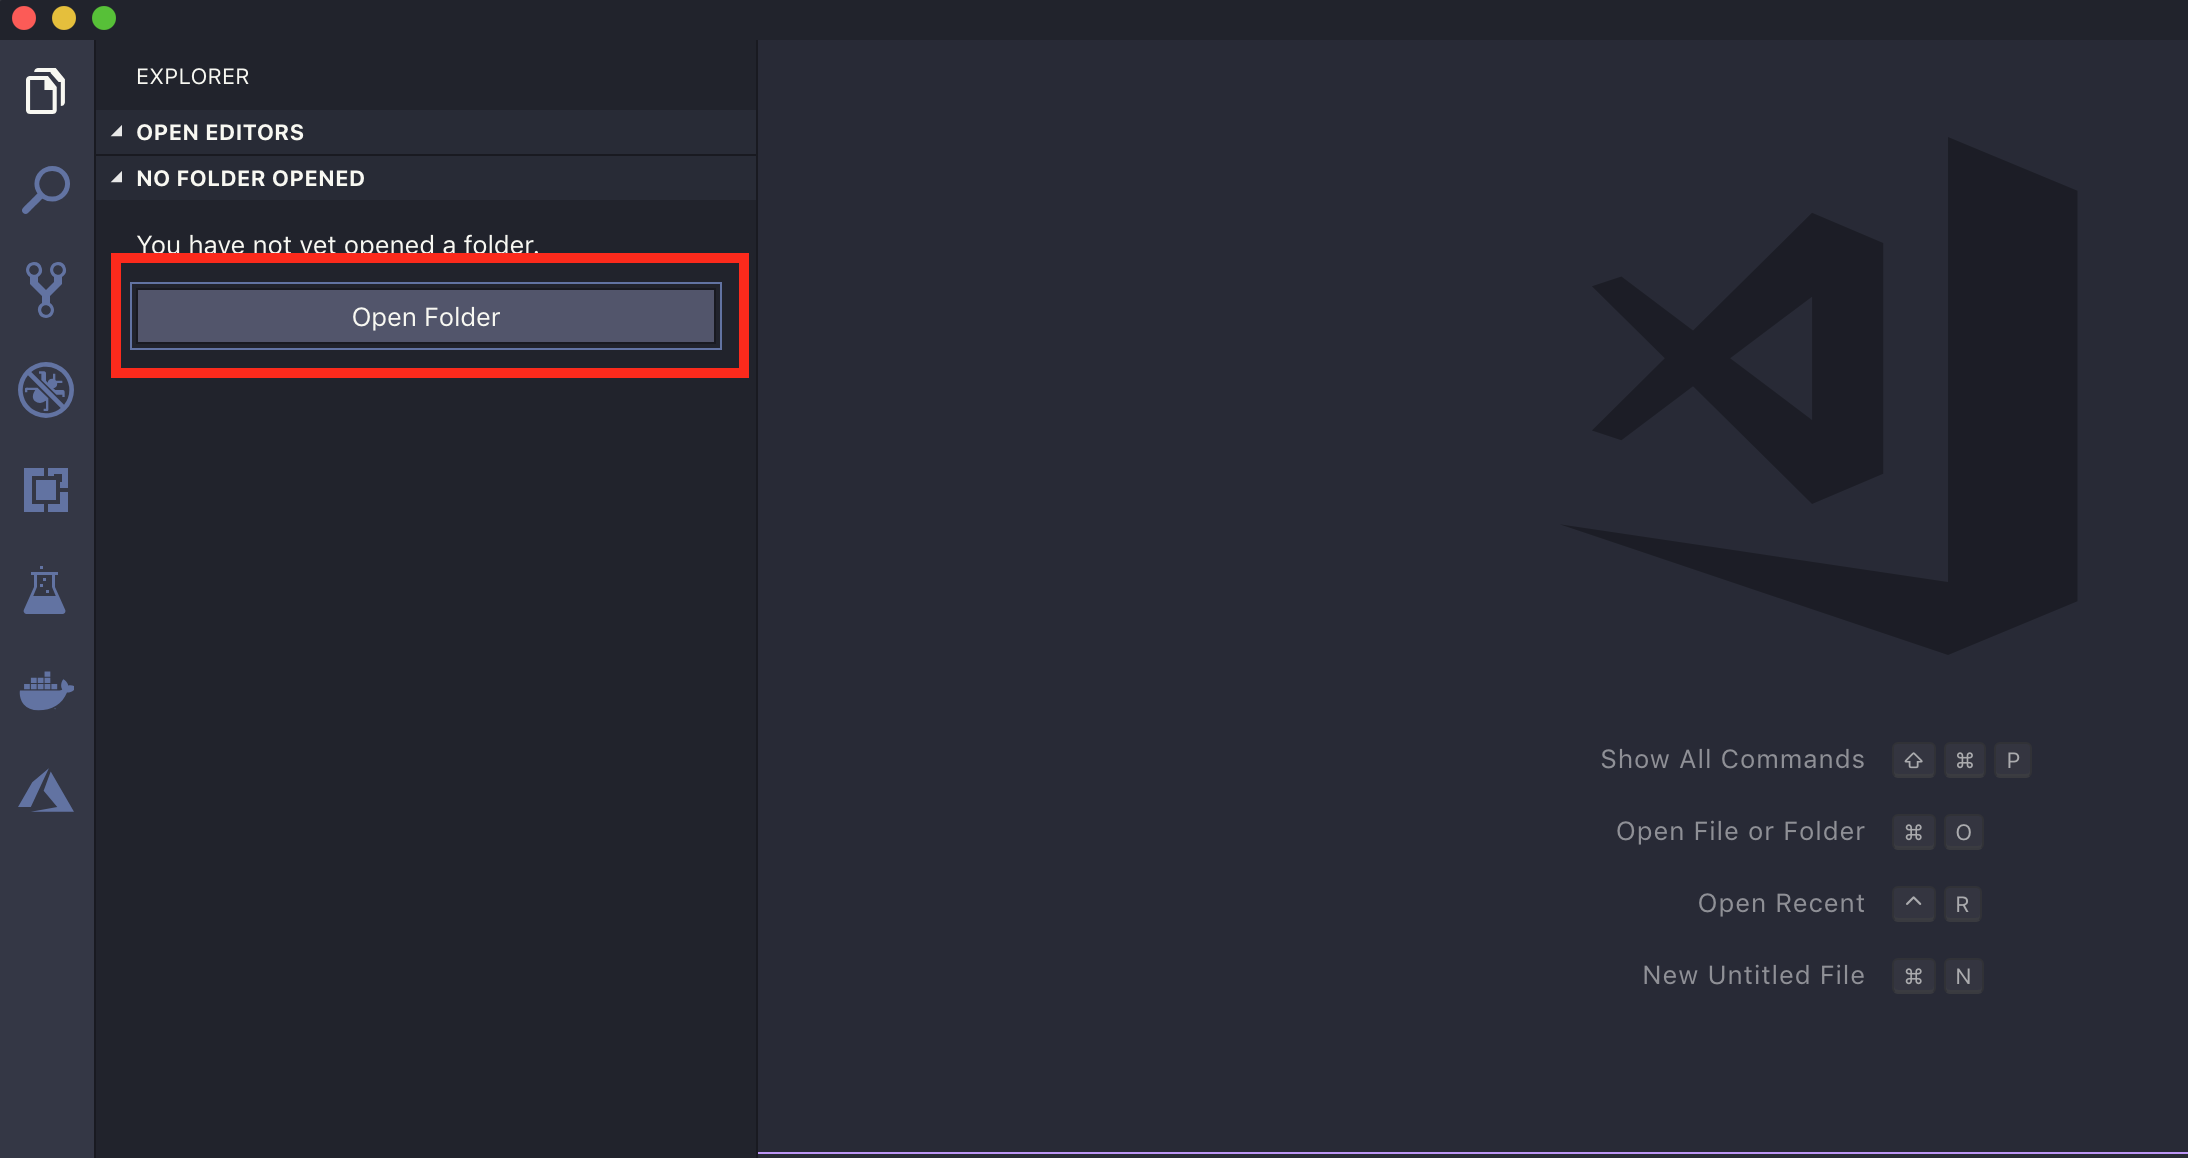 Click this button to open a folder
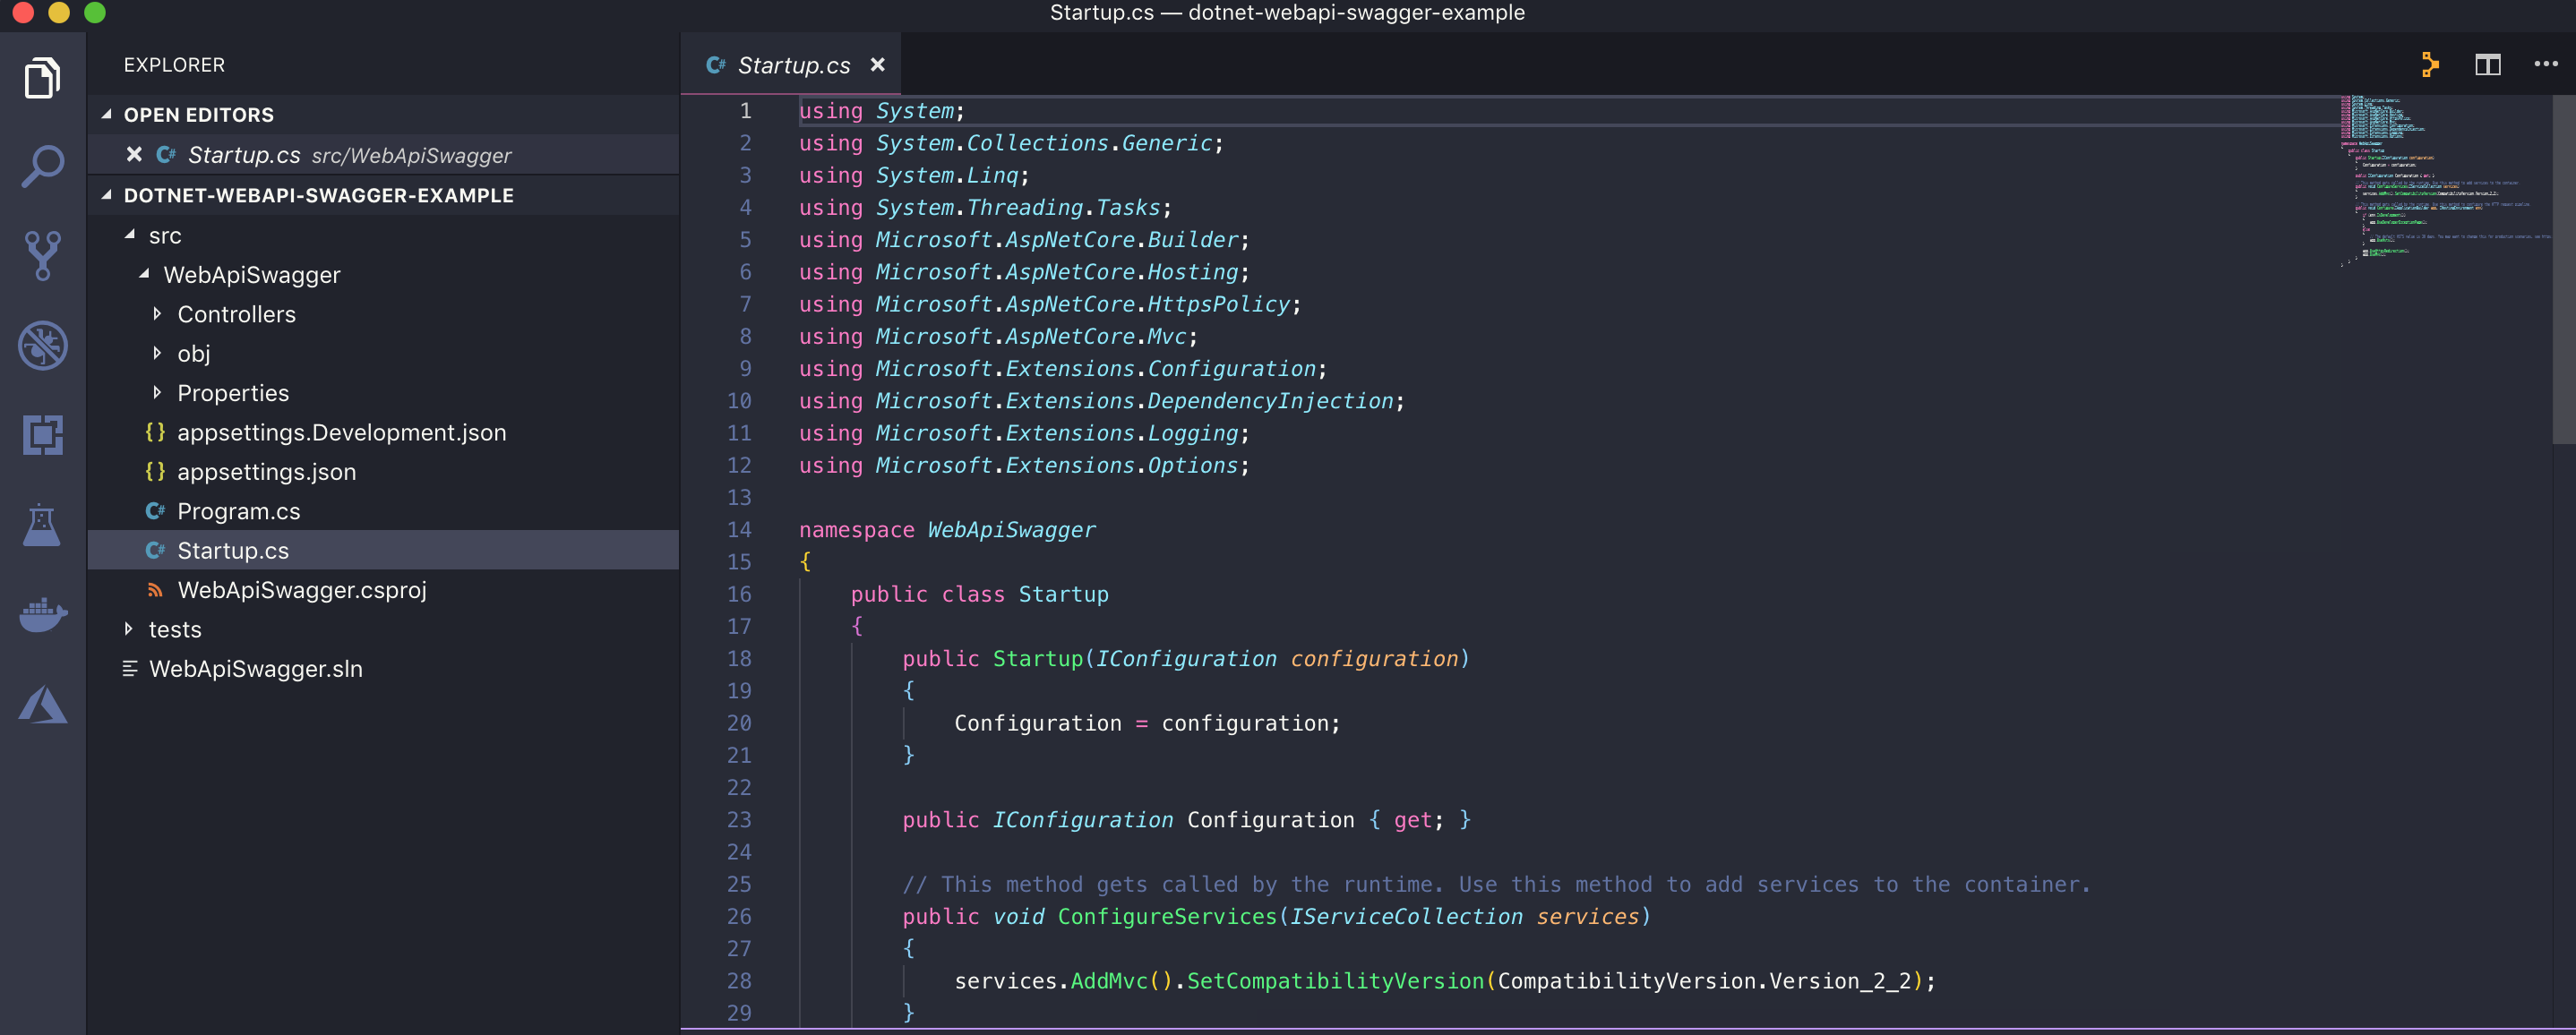 Project loaded in vscode
Add and configure Swashbuckle middleware
With this, the project structure is all set. Now we’ll download the Swashbuckle package from nuget. But before that, don’t forget to navigate to the WebApi root folder:
1
2
cd src/WebApiSwagger/
dotnet add package Swashbuckle.AspNetCore
Swashbuckle added. We need to configure Swashbuckle in ConfigureServices method in order to .NET Core understand that we will be using it. To do so, add the code snippet below in ConfigureServices method located in Startup.cs:
1
2
3
4
5
6
7
8
9
10
11
12
13
14
15
16
17
18
19
20
21
22
23
24
25
26
27
// This method gets called by the runtime. Use this method to add services to the container.
public void ConfigureServices(IServiceCollection services)
{
    // Swagger Config
    services.AddSwaggerGen(c =>
    {
        c.SwaggerDoc("v1", new Info
        {
            Version = "v1",
            Title = "WebApi Swagger Example API",
            Description = "Values API Swagger Example",
            TermsOfService = "None",
            Contact = new Contact
            {
                Name = "Daniel Padua",
                Email = "daniel.padua@outlook.com",
                Url = "https://www.linkedin.com/in/danielpadua"
            }
        });
        // Set the comments path for the Swagger JSON and UI.
        var xmlFile = $"{Assembly.GetExecutingAssembly().GetName().Name}.xml";
        var xmlPath = Path.Combine(AppContext.BaseDirectory, xmlFile);
        c.IncludeXmlComments(xmlPath);
    });

    services.AddMvc().SetCompatibilityVersion(CompatibilityVersion.Version_2_2);
}
Note: If you can’t import Swashbuckle namespace through (ctrl+.), press (ctrl+shift+p) and write: “Reload Window” and type Enter. This will force a reboot in vscode, and it will return with intellisense updated.
And also register in pipeline:
1
2
3
4
5
6
7
8
9
10
11
12
13
14
15
16
17
18
19
20
21
22
23
24
25
26
27
28
29
// This method gets called by the runtime. Use this method to configure the HTTP request pipeline.
public void Configure(IApplicationBuilder app, IHostingEnvironment env)
{
    if (env.IsDevelopment())
    {
        app.UseDeveloperExceptionPage();
    }
    else
    {
        // The default HSTS value is 30 days. You may want to change this for production scenarios, see https://aka.ms/aspnetcore-hsts.
        app.UseHsts();
    }

    // Add Swagger/SwaggerUI to pipeline
    app.UseSwagger(c =>
    {
        c.PreSerializeFilters.Add((document, request) =>
        {
            document.Paths = document.Paths.ToDictionary(p => p.Key.ToLowerInvariant(), p => p.Value);
        });
    }).UseSwaggerUI(c =>
    {
        c.SwaggerEndpoint("/swagger/v1/swagger.json", "WebApi Swagger API v1");
        c.RoutePrefix = string.Empty;
    });

    app.UseHttpsRedirection();
    app.UseMvc();
}
We are just configuring what will be shown in swagger.json/SwaggerUI, contact information, terms of use, version etc. However it’s important to notice that we are searching for a XML file that has the same name of the output DLL generated when compiling the project, and this XML will be added to Swagger configuration. This file is in fact the documentation itself of your project.
In order to generate this file when compiling, we need to manually edit WebApiSwagger.json file, and insert the following lines in PropertyGroup section:
1
2
<GenerateDocumentationFile>true</GenerateDocumentationFile>
<NoWarn>$(NoWarn);1591</NoWarn>
The first line enables the XML file generation, the other one tells the compiler to hide warnings if there’s any undocumented method in the project.
It’s importante to note that in the line c.RoutePrefix = string.Empty we are telling Swashbuckle that SwaggerUI (The graphic user interface of the documentation) will be executed in the root URL of your API. If you wish to set another route, you just have to replace string.Empty to desired route (example: “swagger”).
You can write some documentation to Get endpoint of ValuesController, only for tests purposes:
1
2
3
4
5
6
7
8
9
10
11
// GET api/values
/// <summary>
/// GET method documentation
/// </summary>
/// <returns>String array</returns>
[HttpGet]
[ProducesResponseType(typeof(string[]), StatusCodes.Status200OK)]
public ActionResult<IEnumerable<string>> Get()
{
    return new string[] { "value1", "value2" };
}
The annotation (ProducesResponseType) defines the documentation of the possible output HttpStatusCodes of your endpoint.
Executing the project
Execute the project through “dotnet run” while being in the same directory of “WebApiSwagger.csproj” or execute through OmniSharp debug.
Open your browser and access: “http://localhost:5000”:
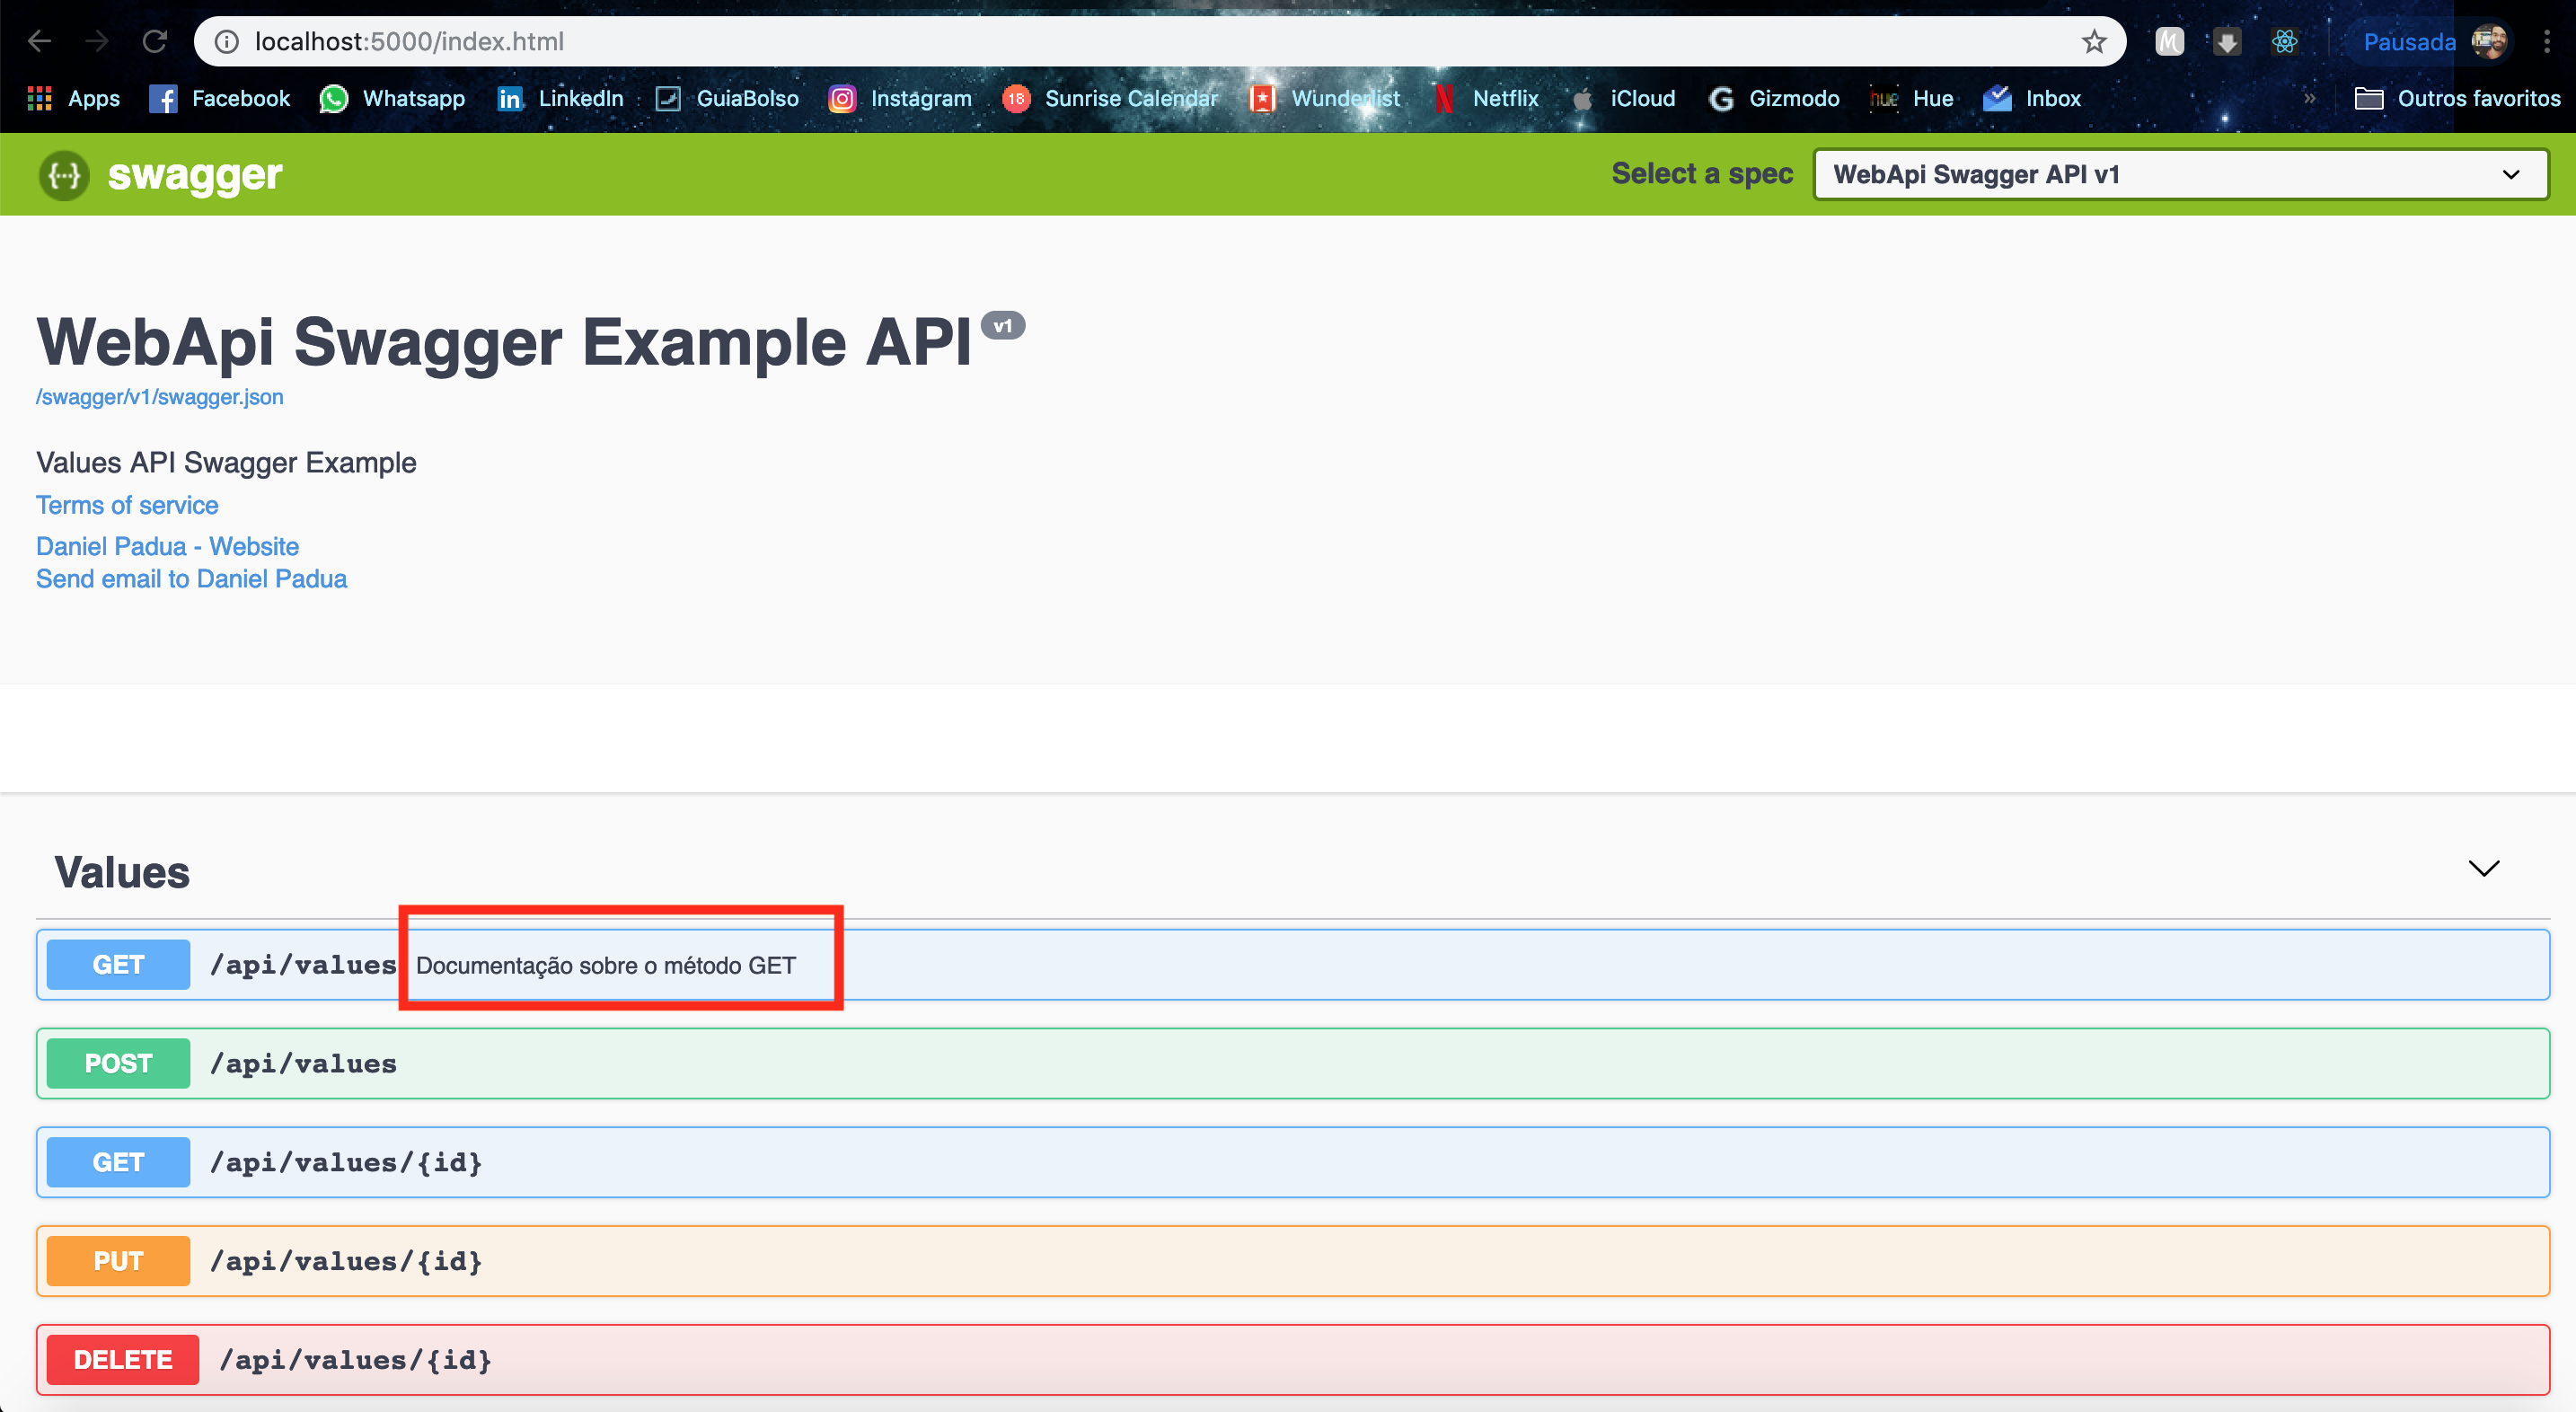 Notice GET documentation
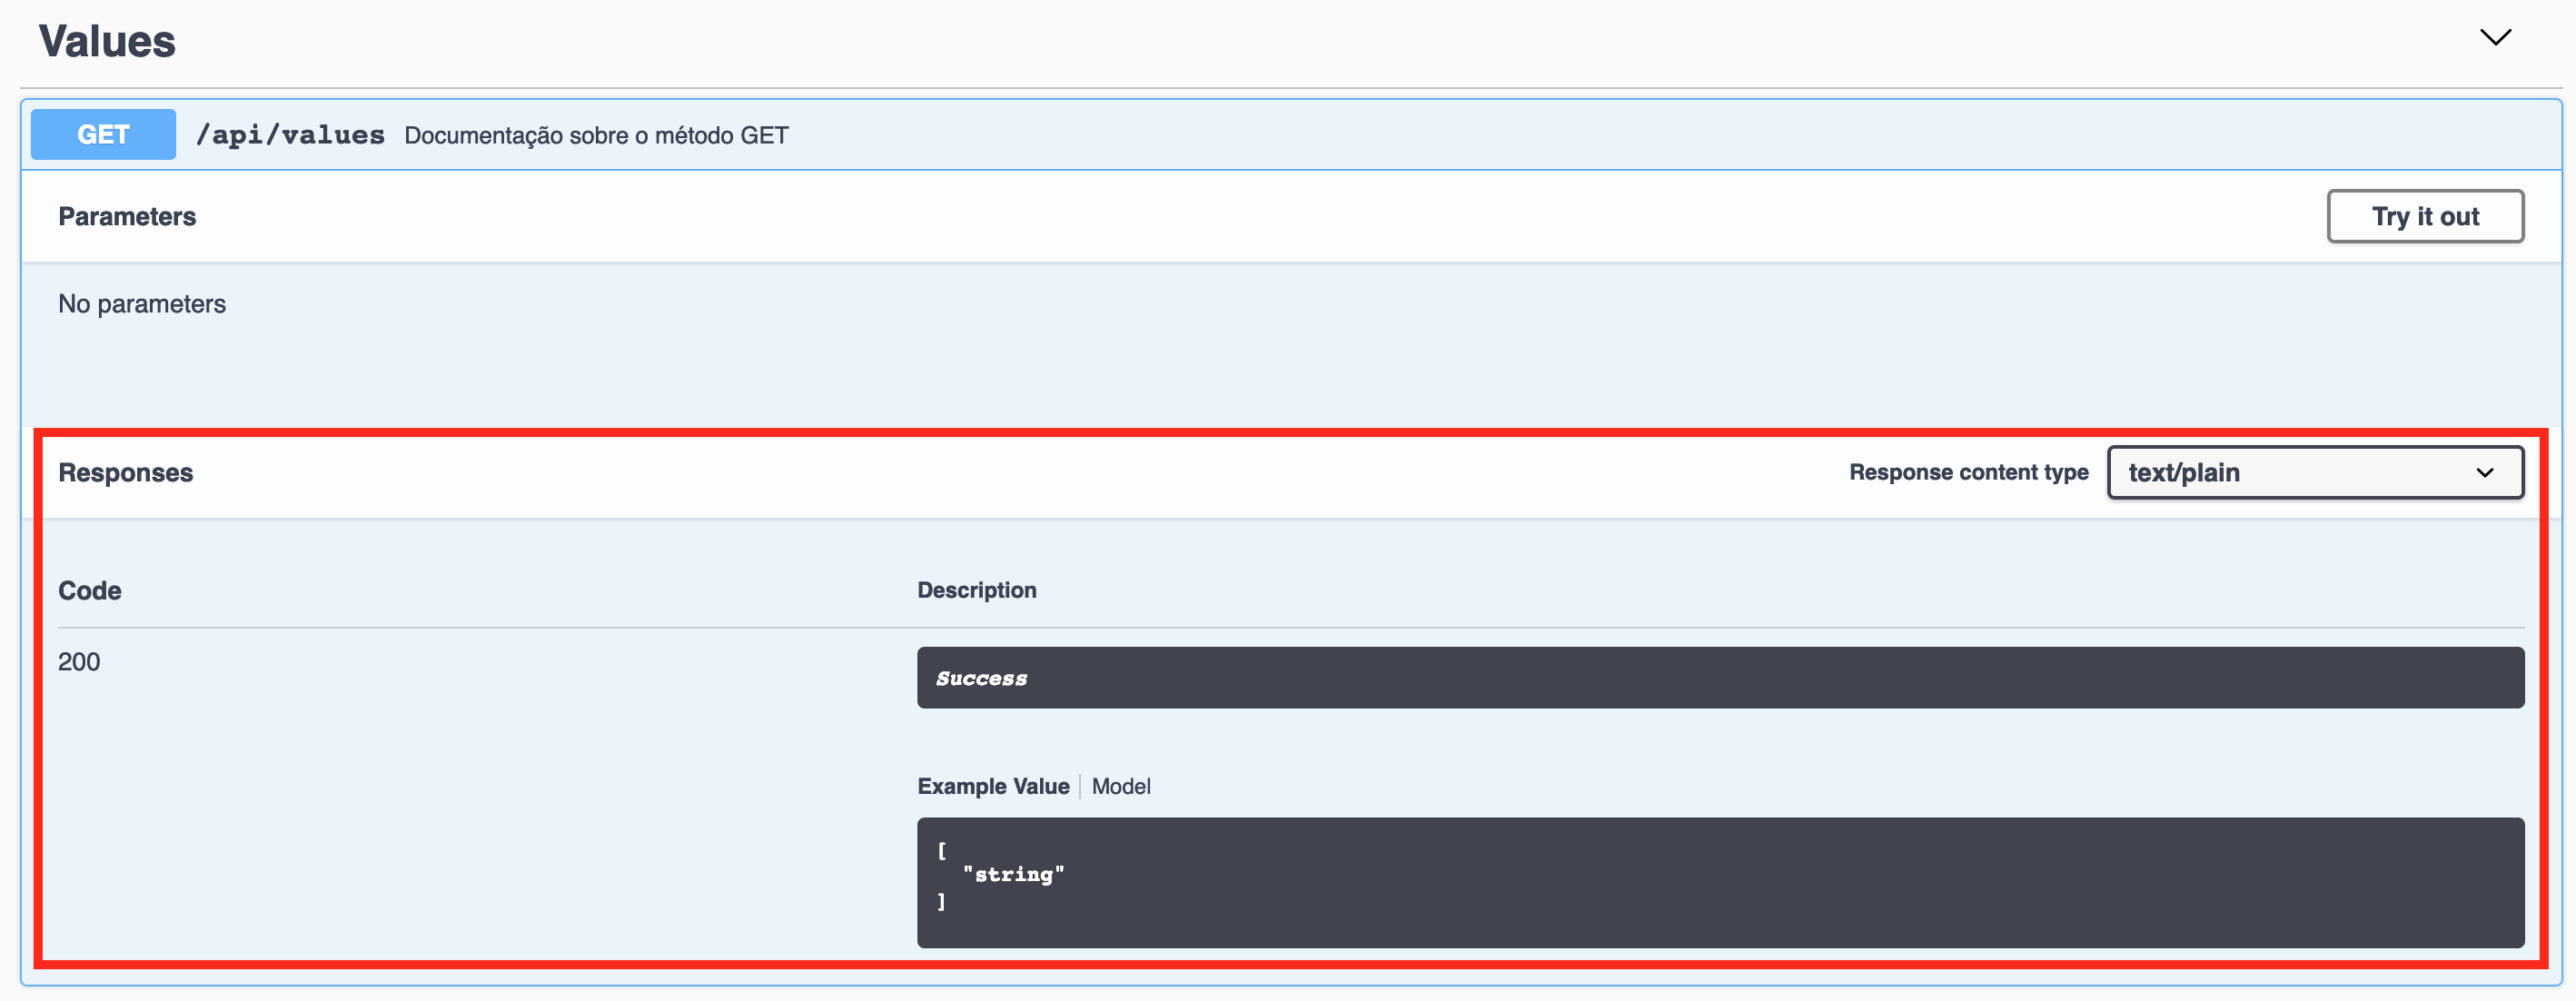 Possible return HTTP status codes of the endpoint
Conclusion
The nuget package Swashbuckle eases the Swagger documentation of a WebApi project, speeding up the documentation and maybe even local tests through SwaggerUI. Now there is no excuse for not doing documentation :)
The full code for this guide is in this github repository.
See you soon!