
Intro
Protocol Buffers (protobuf) is a method of serializing structured data which is particulary useful to communication between services or storing data. It was designed by Google early 2001 (but only publicly released in 2008) to be smaller and faster than XML. Protobuf messages are serialized into a binary wire format which is very compact and boosts performance.
Details
This protocol involves a specific interface description language to describe the data structure defined in a .proto file. A program from any language supported is able to generate source code from that description in order to create or parse a stream of bytes that represents the structured data. Protocol buffers can serve as basis for a remote procedure call (RPC) which are widely used for inter-machine communication, most commonly used with gRPC. Protobuf is similar to Apache Thrift used by Facebook, Ion by Amazon or Microsoft Bonds Protocol.
Example
In this example we will be creating two projects:
A Java console application that will use the customer .proto specification to generate a file with a hard coded customer
A C# console application that will read the hard coded customer file generated by Java console application, and display the data in console
tl;dr
If you just want to read some code and figure it out on your own, I’ve setup these two applications repository. First follow instructions of the README file of the Java project repository: https://github.com/danielpadua/protobuf-example-java
Then after generating the protobuf serialized file, follow the instructions of the README file of the C# project repository: https://github.com/danielpadua/protobuf-example-csharp
Protobuf Contract
First of all, let’s create a structure that will represent a customer. The data required for a customer are:
- Unique identification
- Photo
- Name
- Birthdate
- Creation timestamp
- Last update timestamp
So, we need to create a .proto file like this:
1
2
3
4
5
6
7
8
9
10
11
12
13
14
15
16
17
18
19
20
21
22
syntax = "proto3";

package danielpadua.protobufexample.contracts;

option java_multiple_files = true;
option java_outer_classname = "CustomerProto";
option java_package = "dev.danielpadua.protobufexamplejava.contracts";
option csharp_namespace = "DanielPadua.ProtobufExampleDotnet.Contracts";

import "google/protobuf/timestamp.proto";
import "money.proto";
import "date.proto";

message Customer {
    int64 id = 1;
    bytes photo = 2;
    string name = 3;
    google.type.Date birthdate = 4;
    google.type.Money balance = 5;
    google.protobuf.Timestamp createdAt = 6;
    google.protobuf.Timestamp updatedAt = 7;
}
Some notes about the code above:
Timestamp type is a “Well Known Type” introduced in proto3, you can use these types by importing in the first lines of proto file
Date and Money types are a “Google Common Type”, differently than “Well Known Type” you are not able to use it only by importing. You have to copy these types definitions file from google repository and paste it in your project whatever the language you are using.
There are other scalar types, you can read the documentation here. Well Known Types here or Google Common Types here.
This .proto file will be a common resource in C# and Java but for simplicity sake, I’ll recreate it in both projects repository. The ideal for big and complex projects is to have a separate repository as a neutral ground for projects.
Java Console Application
That said, let us start by creating the Java console application. For this example I’ll be using OpenJDK 15, IntelliJ IDEA CE and Maven as build tool to do so.
- Open IntelliJ IDEA CE and choose to create a new project
 Creating a new project
- Choose Maven in the left panel, select your Java JDK at top of right side. As said I’ll be using OpenJDK 15 previously installed
 New project details
- Fill the next fields as you wish, for example:
 Project maven settings
Project created, let’s start by adding project source encoding, telling maven compiler we are using JDK 15 and adding protobuf-java dependency by Google. Add the following lines to pom.xml under “project” tag, right after “version” tag:
1
2
3
4
5
6
7
8
9
10
11
12
13
<properties>
    <project.build.sourceEncoding>UTF-8</project.build.sourceEncoding>
    <maven.compiler.source>15</maven.compiler.source>
    <maven.compiler.target>15</maven.compiler.target>
</properties>

<dependencies>
    <dependency>
        <groupId>com.google.protobuf</groupId>
        <artifactId>protobuf-java</artifactId>
        <version>3.13.0</version>
    </dependency>
</dependencies>
Now let’s include the .proto files defined in the section above. But before create a proto directory in src/main:
 Creating protobuf files directory
Then add a new file named: customer.proto to it and add the code mentioned in above section:
 Error importing other protobuf files
The money.proto and date.proto imports will be pointing error, because we did not created it yet. You can create then repeating the process above and adding the of money.proto and date.proto from Google repository.
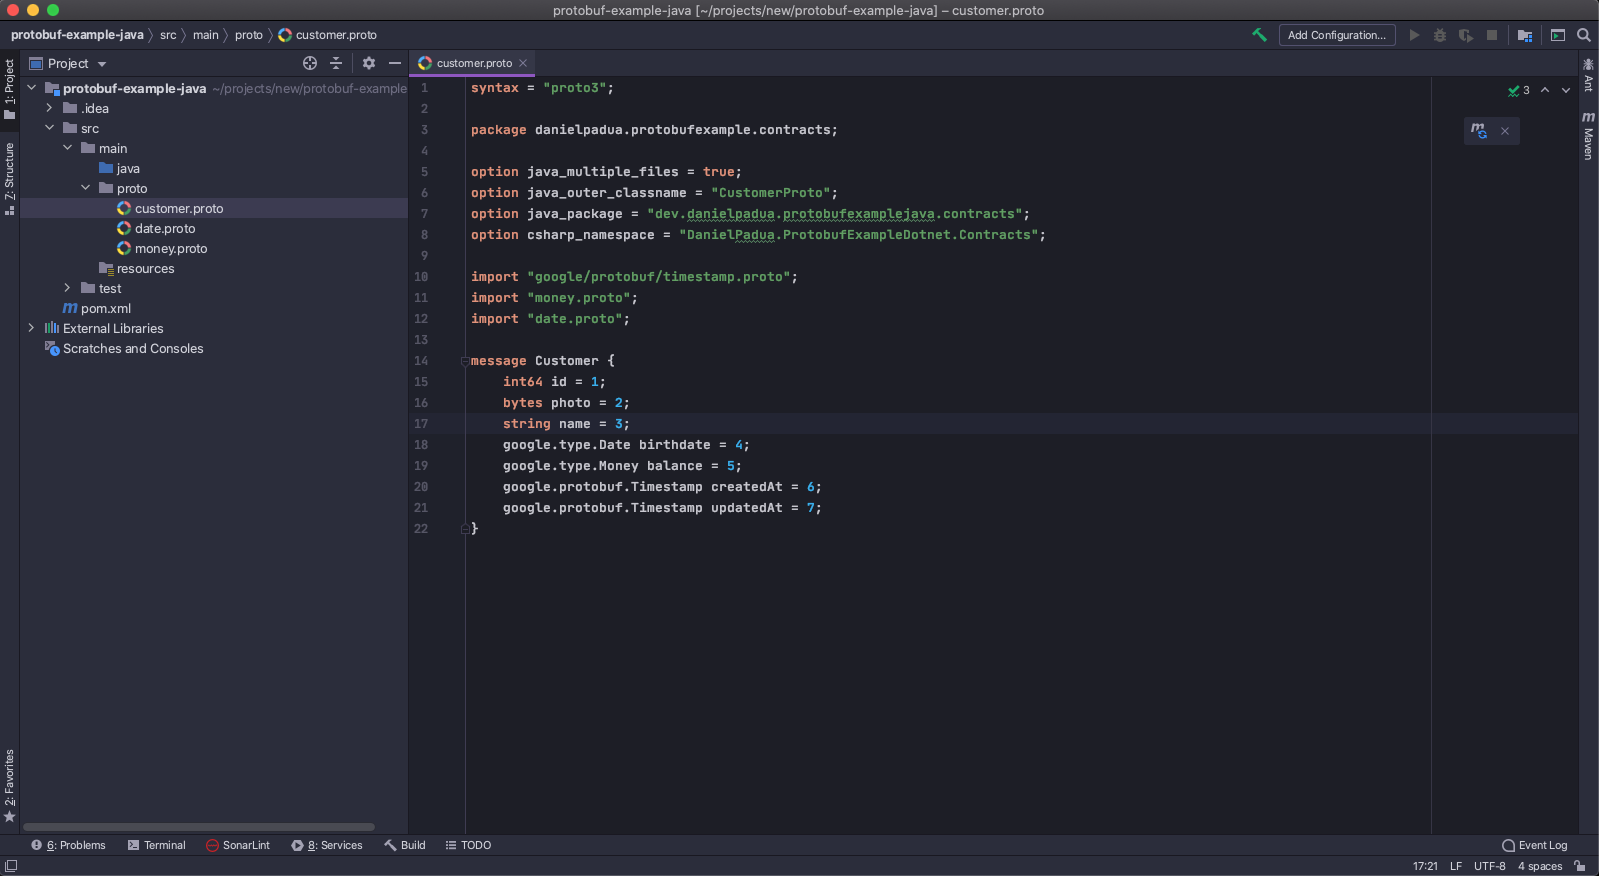 customer.proto without errors
Ok, protobuf contracts created, now, to generate code (java classes) from this contract, we need to use protoc executable to compile .proto files targeting the desired output language. There are two main ways of doing this:
Manually, by downloading protoc in your machine and running it. If you wish to proceed with this method read protoc installation guide here
Automatically, by adding protoc code generation to your maven project build. There are several maven plugins for this, but I will be using protoc-jar-maven-plugin, that wraps protoc executable as a jar so it can run in any OS and compile your .proto files.
You can use it by adding these lines to your pom.xml under “project” tag, right after “dependencies” tag:
1
2
3
4
5
6
7
8
9
10
11
12
13
14
15
16
17
18
19
20
21
22
23
24
25
26
27
28
29
30
<build>
    <plugins>
        <plugin>
            <groupId>com.github.os72</groupId>
            <artifactId>protoc-jar-maven-plugin</artifactId>
            <version>3.11.4</version>
            <executions>
                <execution>
                    <id>protoc.main</id>
                    <phase>generate-sources</phase>
                    <goals>
                        <goal>run</goal>
                    </goals>
                    <configuration>
                        <protocVersion>3.13.0</protocVersion>
                        <addSources>main</addSources>
                        <includeMavenTypes>direct</includeMavenTypes>
                        <includeStdTypes>true</includeStdTypes>
                        <includeDirectories>
                            <include>src/main/proto</include>
                        </includeDirectories>
                        <inputDirectories>
                            <include>src/main/proto</include>
                        </inputDirectories>
                    </configuration>
                </execution>
            </executions>
        </plugin>
    </plugins>
</build>
Always check for newer stable versions before adding dependencies or plugins to your
pom.xml.
We are also including the proto directory structure so the plugin can know where the .proto files are, and compile them.
At this point you might want to run protoc compiler to generate the java protobuf contract classes so, click maven tab and run maven goal button and run a mvn clean install
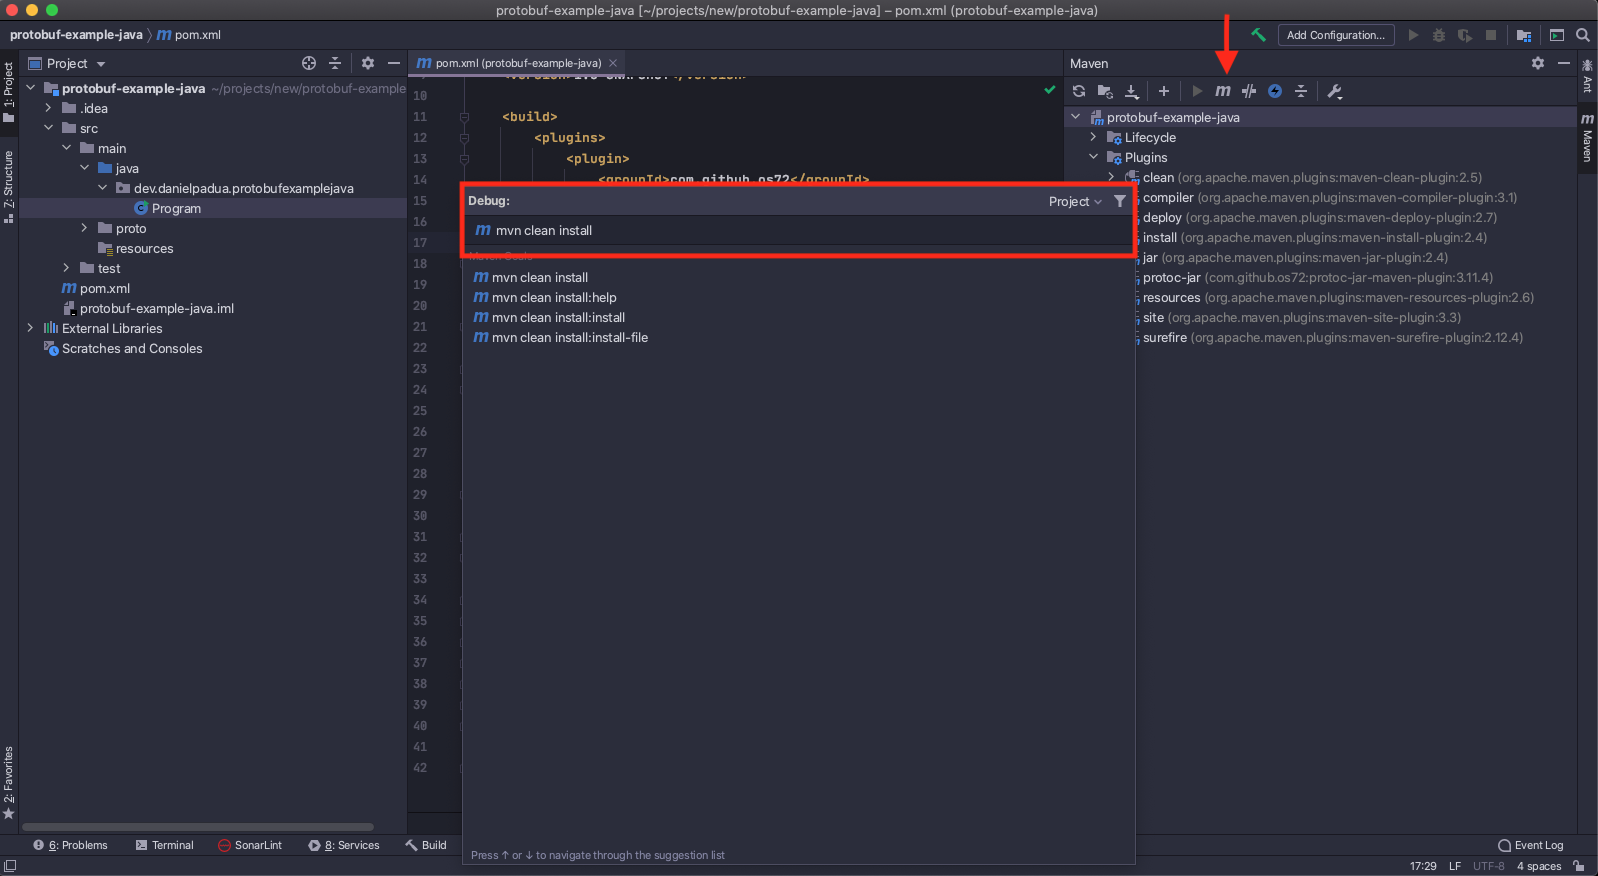 Running maven clean install
If is successfully compiled, this message will pop up:
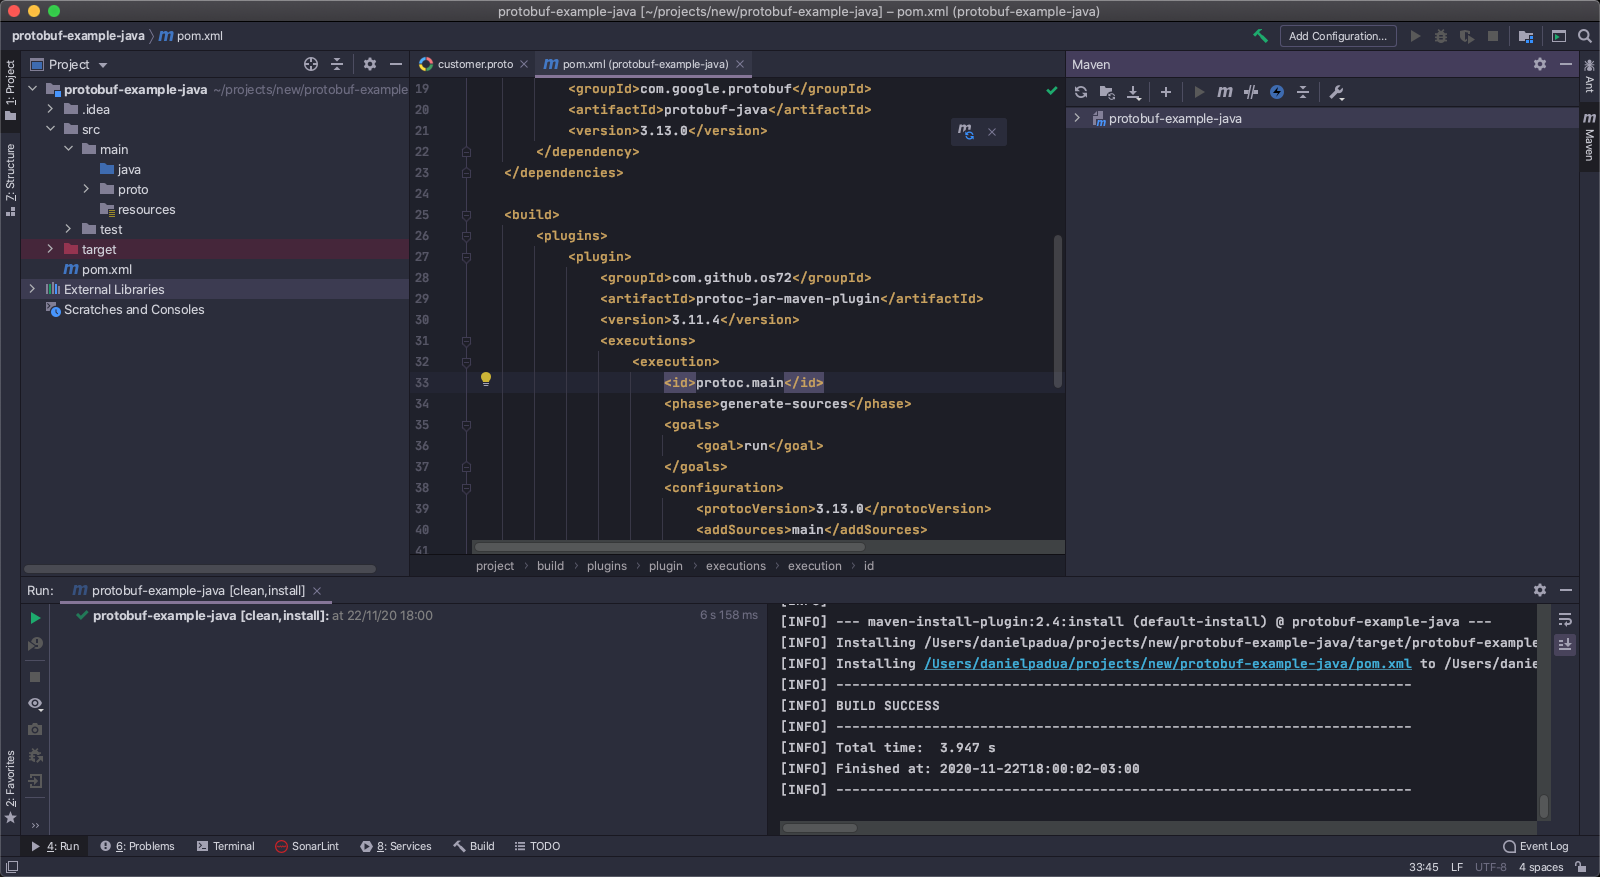 A build of success
Next, create a package dev.danielpadua.protobufexamplejava and put inside a main class for our console application:
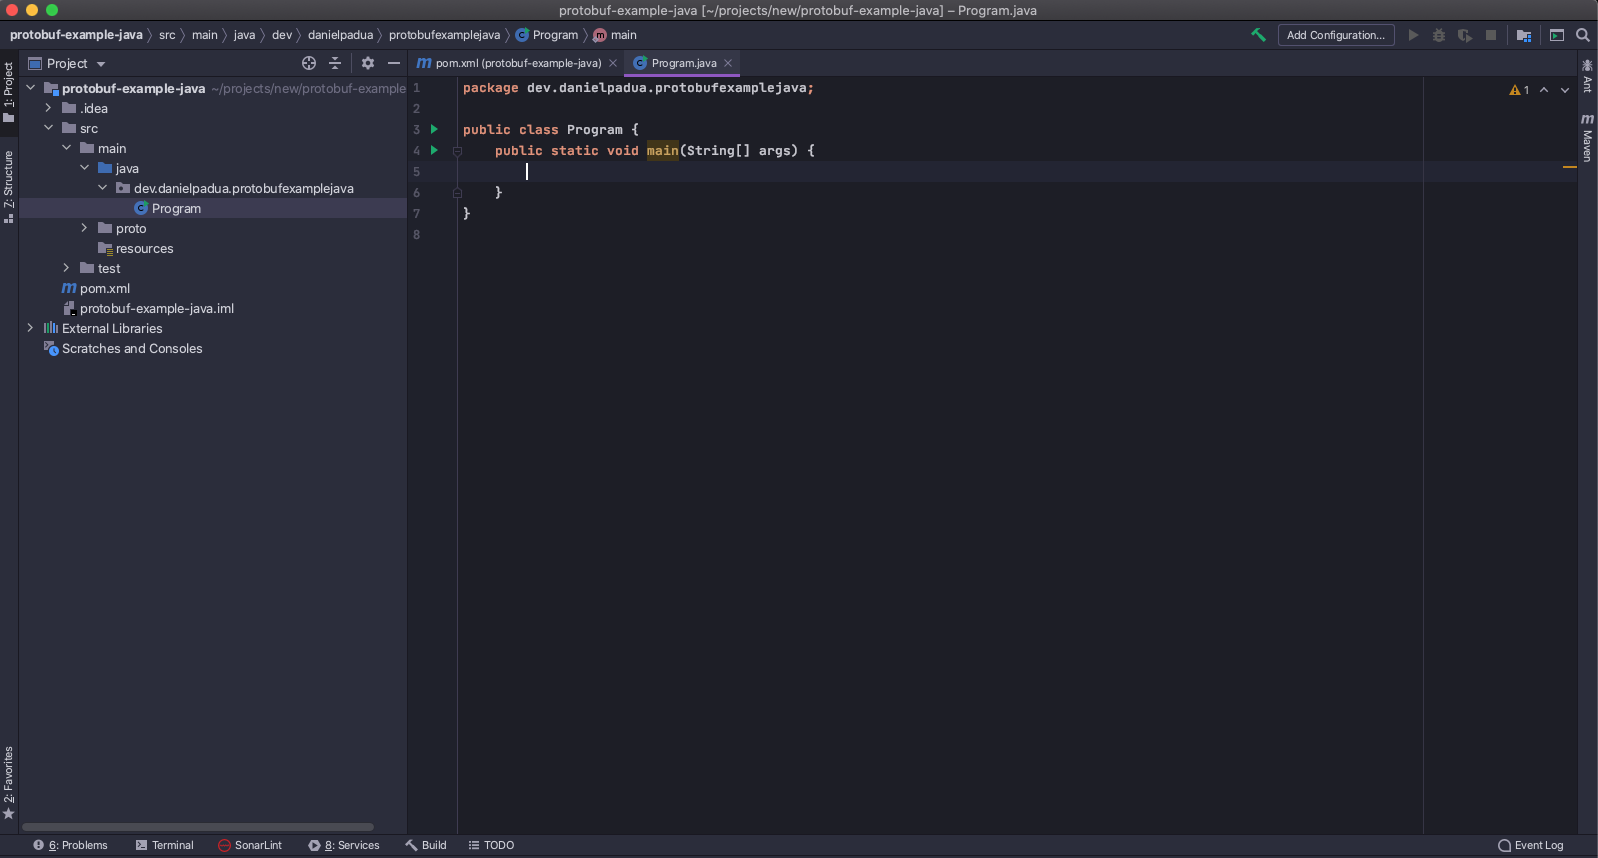 Our main method
If you type “Customer” IntelliJ autocompletion will appear and suggest to import the class that was generated by protoc via plugin:
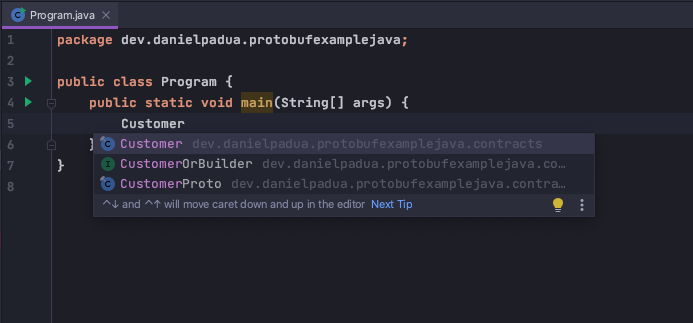 Autocomplete success with autogenerated classes
So, it all went well. Now we can write the code to generate a hard coded customer and write it to a file in a directory you want (inside main method):
1
2
3
4
5
6
7
8
9
10
11
12
13
14
15
16
17
18
19
20
21
22
23
Date birthdate = Utils.toGoogleDate(LocalDate.of(1990, 4, 30));
Money balance = Utils.toGoogleMoney(BigDecimal.valueOf(9000.53));
Timestamp createdUpdateAt = Utils.toGoogleTimestampUTC(LocalDateTime.now());
String fullPath = "/Users/danielpadua/protobuf/protobuf-customer";

try (FileOutputStream fos = new FileOutputStream(fullPath)) {
    Customer daniel = Customer.newBuilder()
            .setId(1)
            .setPhoto(ByteString.EMPTY)
            .setName("Daniel")
            .setBirthdate(birthdate)
            .setBalance(balance)
            .setCreatedAt(createdUpdateAt)
            .setUpdatedAt(createdUpdateAt)
            .build();

    daniel.writeTo(fos);
    System.out.println("protobuf-customer created successfully");
} catch (FileNotFoundException e) {
    System.out.println(format("could not find file {0}", fullPath));
} catch (IOException e) {
    System.out.println(format("error while reading file {0}. exception: {1}", fullPath, e.getMessage()));
}
Note the code above uses a simple Utils class to convert between Java LocalDate and Google Date, Java BigDecimal and Google Money and Java LocalDateTime and Google Timestamp. You can add my Utils class to your project using the following code:
1
2
3
4
5
6
7
8
9
10
11
12
13
14
15
16
17
18
19
20
21
22
23
24
25
26
27
28
29
30
31
32
33
34
35
36
37
38
39
40
41
42
43
44
45
46
47
48
49
50
51
52
package dev.danielpadua.protobufexamplejava;

import com.google.protobuf.Timestamp;
import com.google.type.Date;
import com.google.type.Money;

import java.math.BigDecimal;
import java.math.MathContext;
import java.time.Instant;
import java.time.LocalDate;
import java.time.LocalDateTime;
import java.time.ZoneOffset;

public class Utils {
    protected static Timestamp toGoogleTimestampUTC(final LocalDateTime localDateTime) {
        return Timestamp.newBuilder()
                .setSeconds(localDateTime.toEpochSecond(ZoneOffset.UTC))
                .setNanos(localDateTime.getNano())
                .build();
    }

    protected static LocalDateTime fromGoogleTimestampUTC(final Timestamp googleTimestamp) {
        return Instant.ofEpochSecond(googleTimestamp.getSeconds(), googleTimestamp.getNanos())
                .atOffset(ZoneOffset.UTC)
                .toLocalDateTime();
    }

    protected static Date toGoogleDate(final LocalDate localDate) {
        return Date.newBuilder()
                .setYear(localDate.getYear())
                .setMonth(localDate.getMonth().getValue())
                .setDay(localDate.getDayOfMonth())
                .build();
    }

    protected static LocalDate fromGoogleDate(final Date googleDate) {
        return LocalDate.of(googleDate.getYear(), googleDate.getMonth(), googleDate.getDay());
    }

    protected static Money toGoogleMoney(final BigDecimal decimal) {
        return Money.newBuilder()
                .setCurrencyCode("USD")
                .setUnits(decimal.longValue())
                .setNanos(decimal.remainder(BigDecimal.ONE).movePointRight(decimal.scale()).intValue())
                .build();
    }

    protected static BigDecimal fromGoogleMoney(final Money googleMoney) {
        return new BigDecimal(googleMoney.getUnits())
                .add(new BigDecimal(googleMoney.getNanos(), new MathContext(9)));
    }
}
If you have the following problem in IntelliJ, you can simply use the suggested solution “Set language level to 8 — Lambdas, type annotations etc”
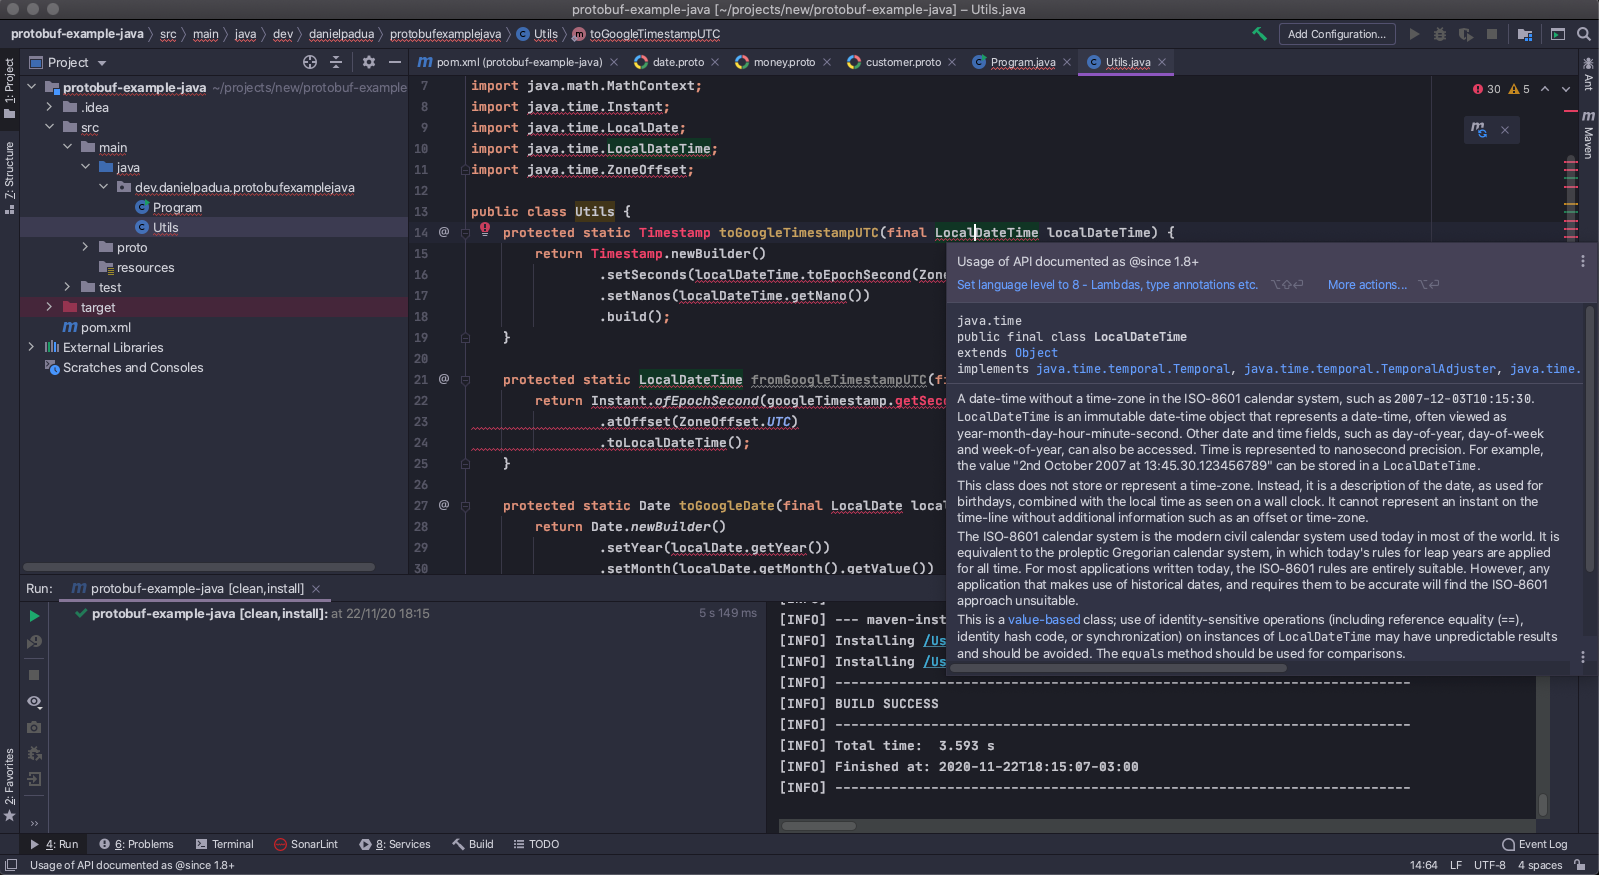 Language level in IntelliJ IDEA
Now, let’s run the application. Click “Add Configuration” button located at top right, right after build button. Click the plus icon and select “Application”:
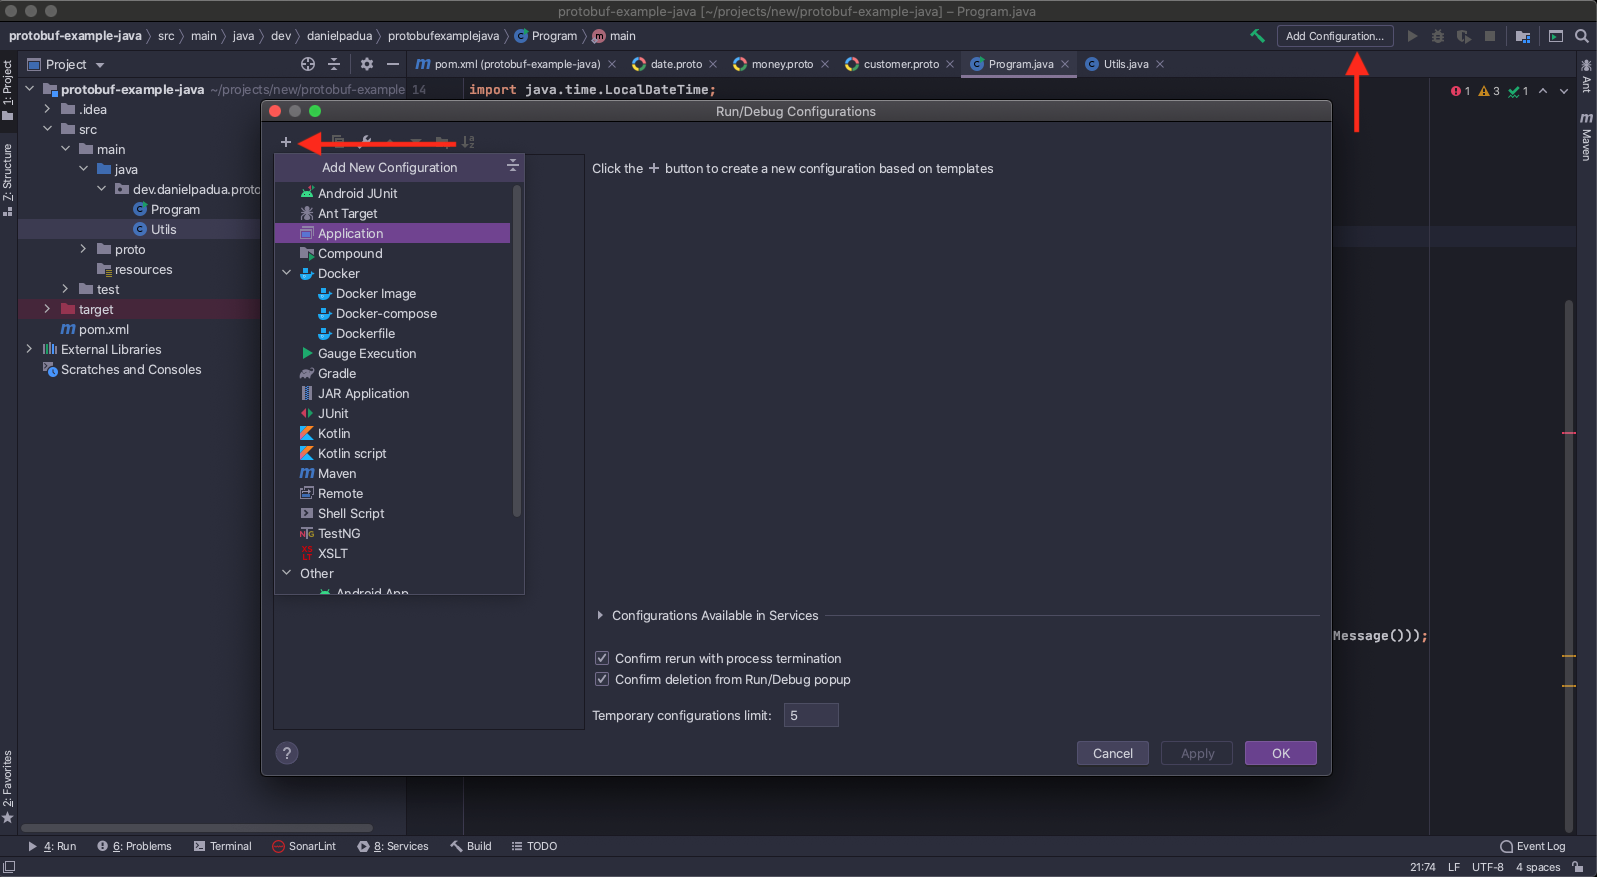 Creating run configuration
Then fill the configuration name and select the main class to run:
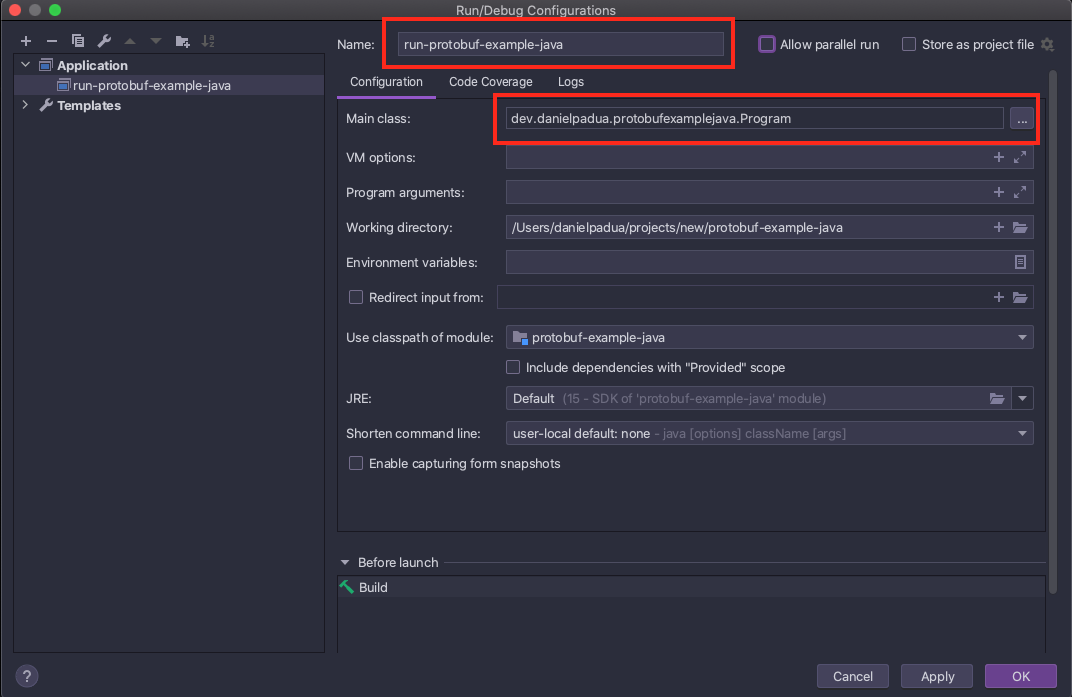 Last fields to fill before launch
After, just click run button or debug it if you want:
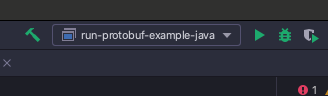 Let’s run!
A successfully result should show the following message:
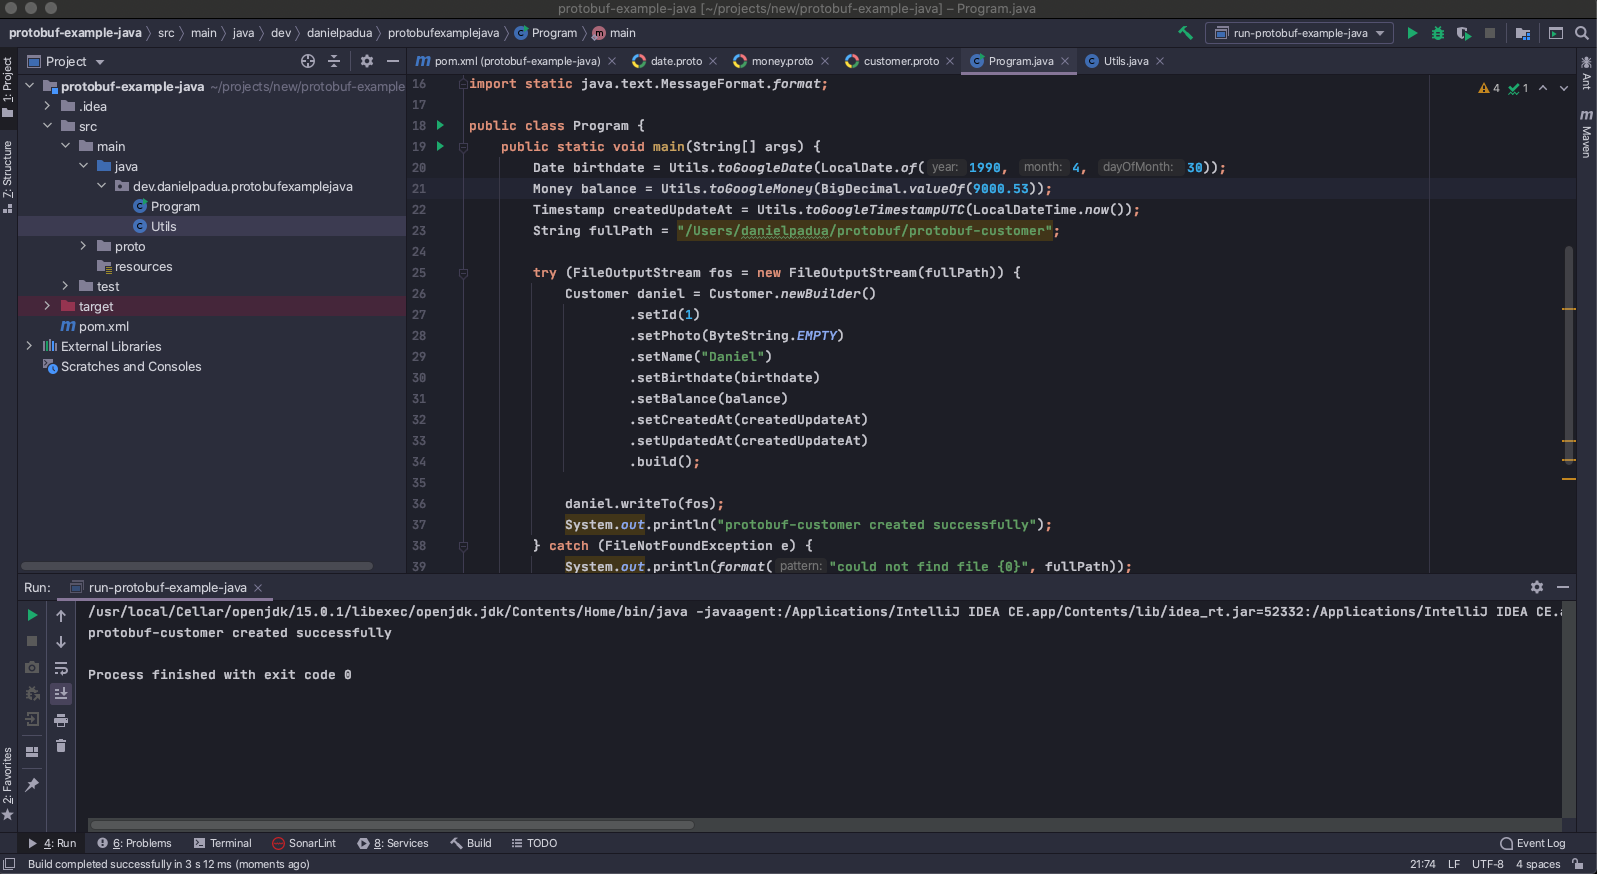 Successfully created protobuf file
Now check the directory you defined for output file:
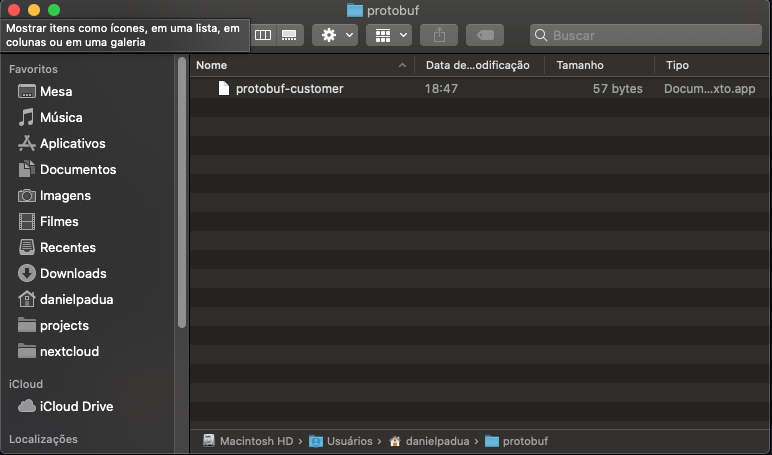 Success!
We successfully implemented a simple Java console application that creates a protobuf message using the structure defined in a .proto file, using automated protobuf compilation with maven build tool. Now to prove it is useful to different languages communication, we’ll create a C# console application to read this file and show in console.
C# Console Application
For the C# example I’ll be using: .NET 5, Visual Studio Code and Grpc.AspNetCore package that has a built-in protobuf compiler that can be attached to dotnet build.
Open Visual Studio Code, open a new terminal, navigate to a directory you want to keep your project and execute the following commands one at a time:
1
2
3
4
5
6
7
8
9
10
11
12
13
# Creates a directory for the solution
mkdir protobuf-example-csharp
# Navigates to solution's directory
cd protobuf-example-csharp
# Creates the main project
dotnet new console -o src/DanielPadua.ProtobufExampleCsharp
# Creates the test project
dotnet new xunit -o tests/DanielPadua.ProtobufExampleCsharp.Tests
# Creates the solution file in root directory
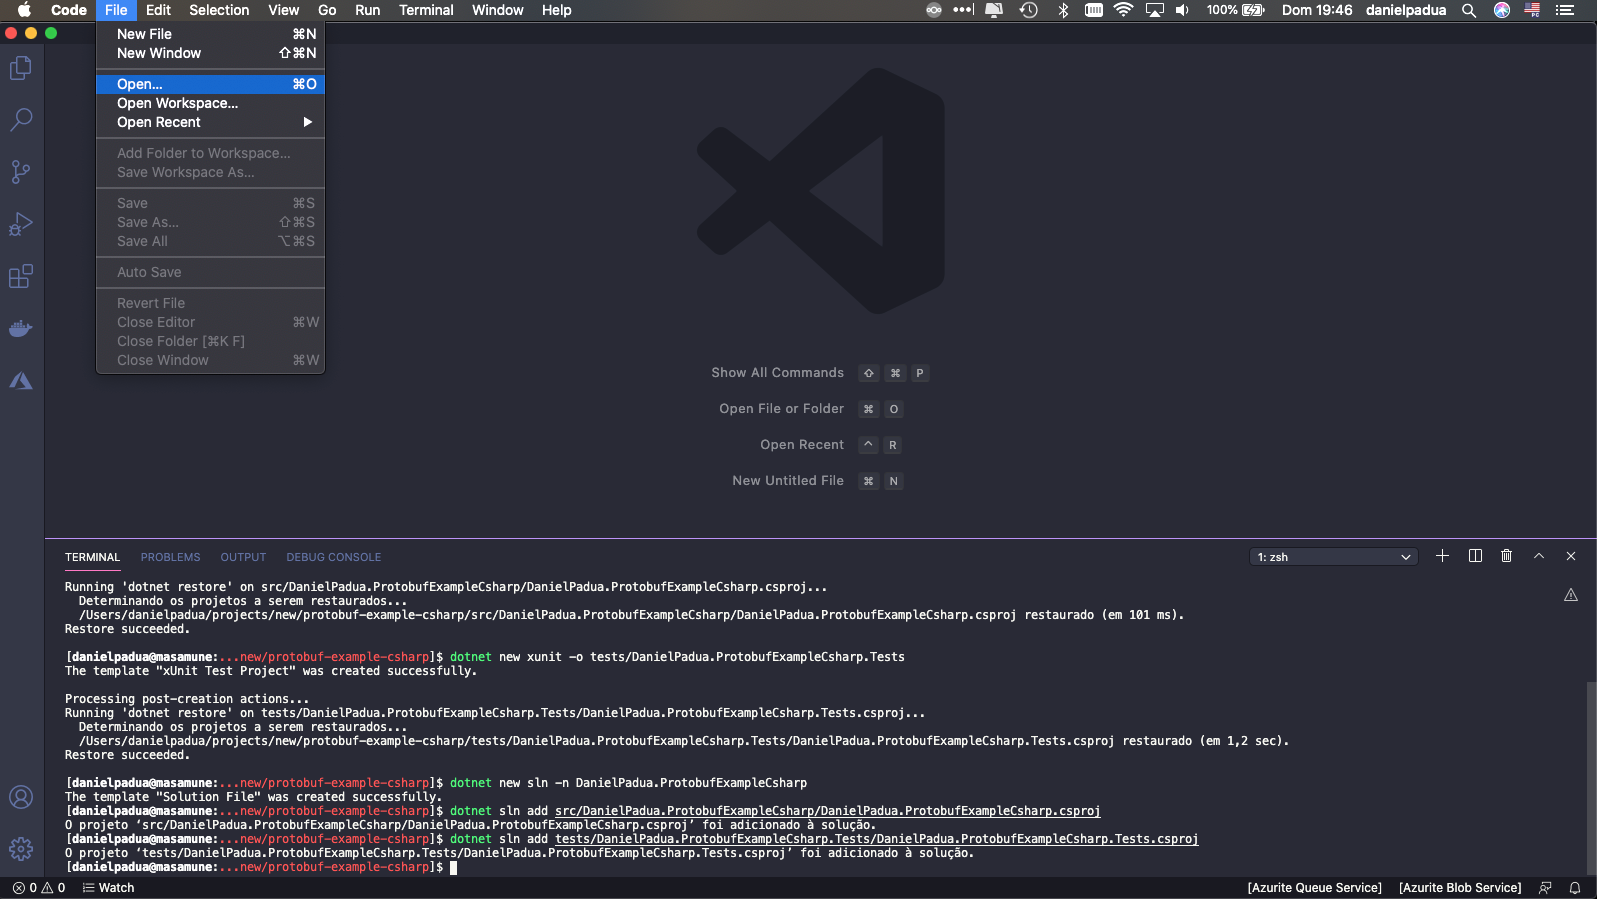
dotnet new sln -n DanielPadua.ProtobufExampleCsharp
# Adds the projects to the solution
dotnet sln add src/DanielPadua.ProtobufExampleCsharp/DanielPadua.ProtobufExampleCsharp.csproj
dotnet sln add tests/DanielPadua.ProtobufExampleCsharp.Tests/DanielPadua.ProtobufExampleCsharp.Tests.csproj
All set, project created, now let’s open it in Visual Studio Code:
 Select the root folder (the one you are at the terminal)
The project structure must look like this:
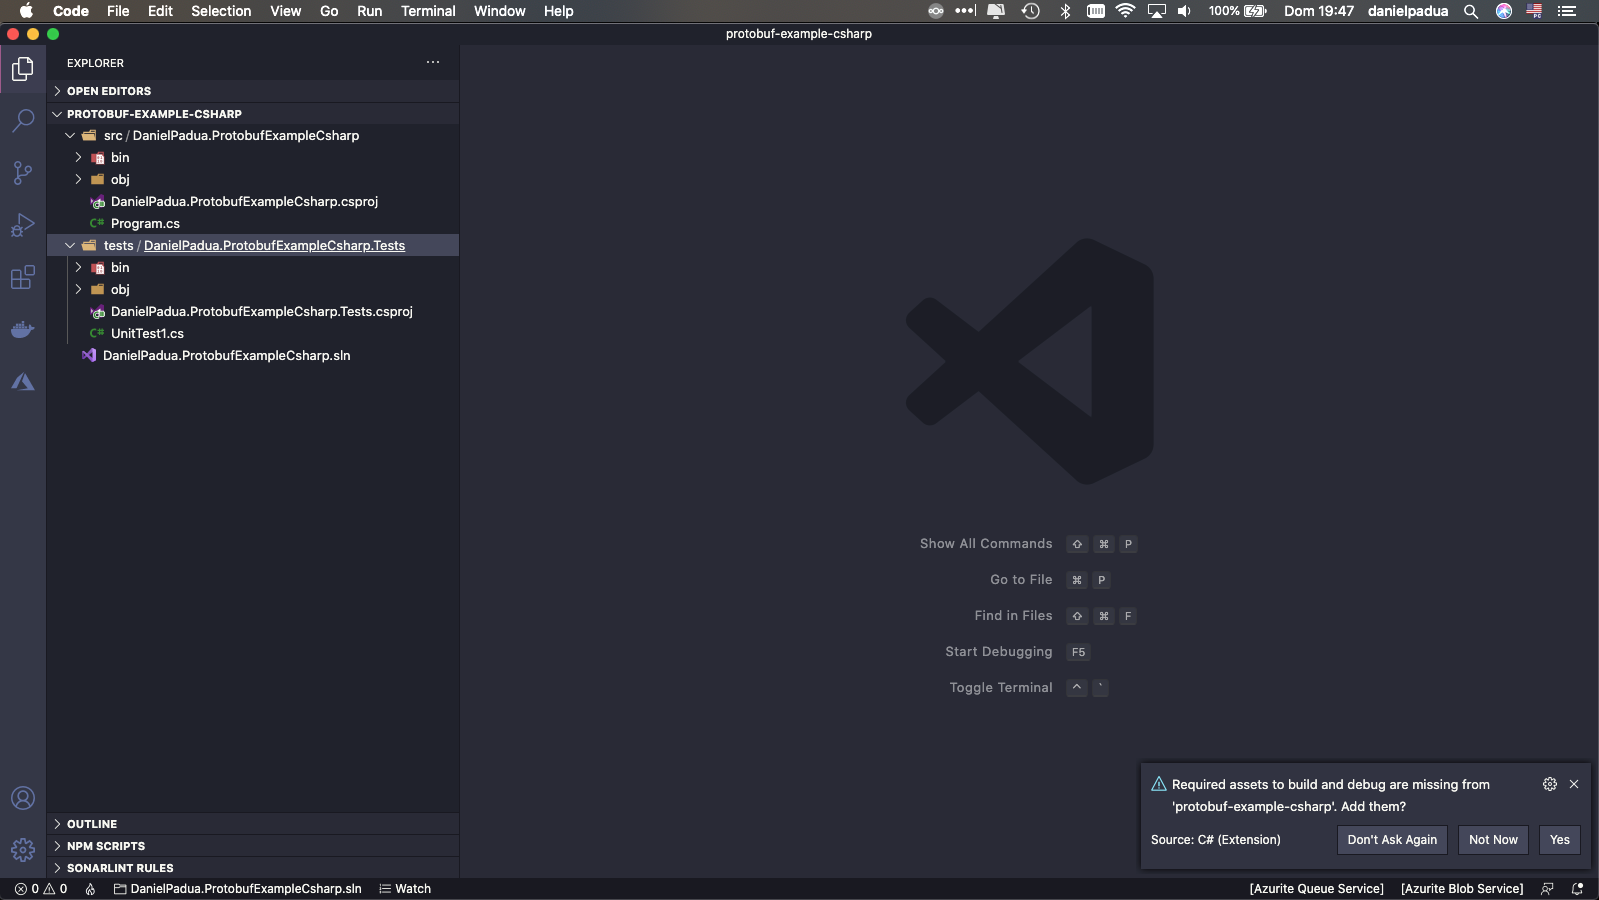 Add the missing assets to build and debug
Click “Yes” in the message at bottom right, for Omnisharp create .vscode folder with assets to run/debug project. Select “DanielPadua.ProtobufExampleCsharp”:
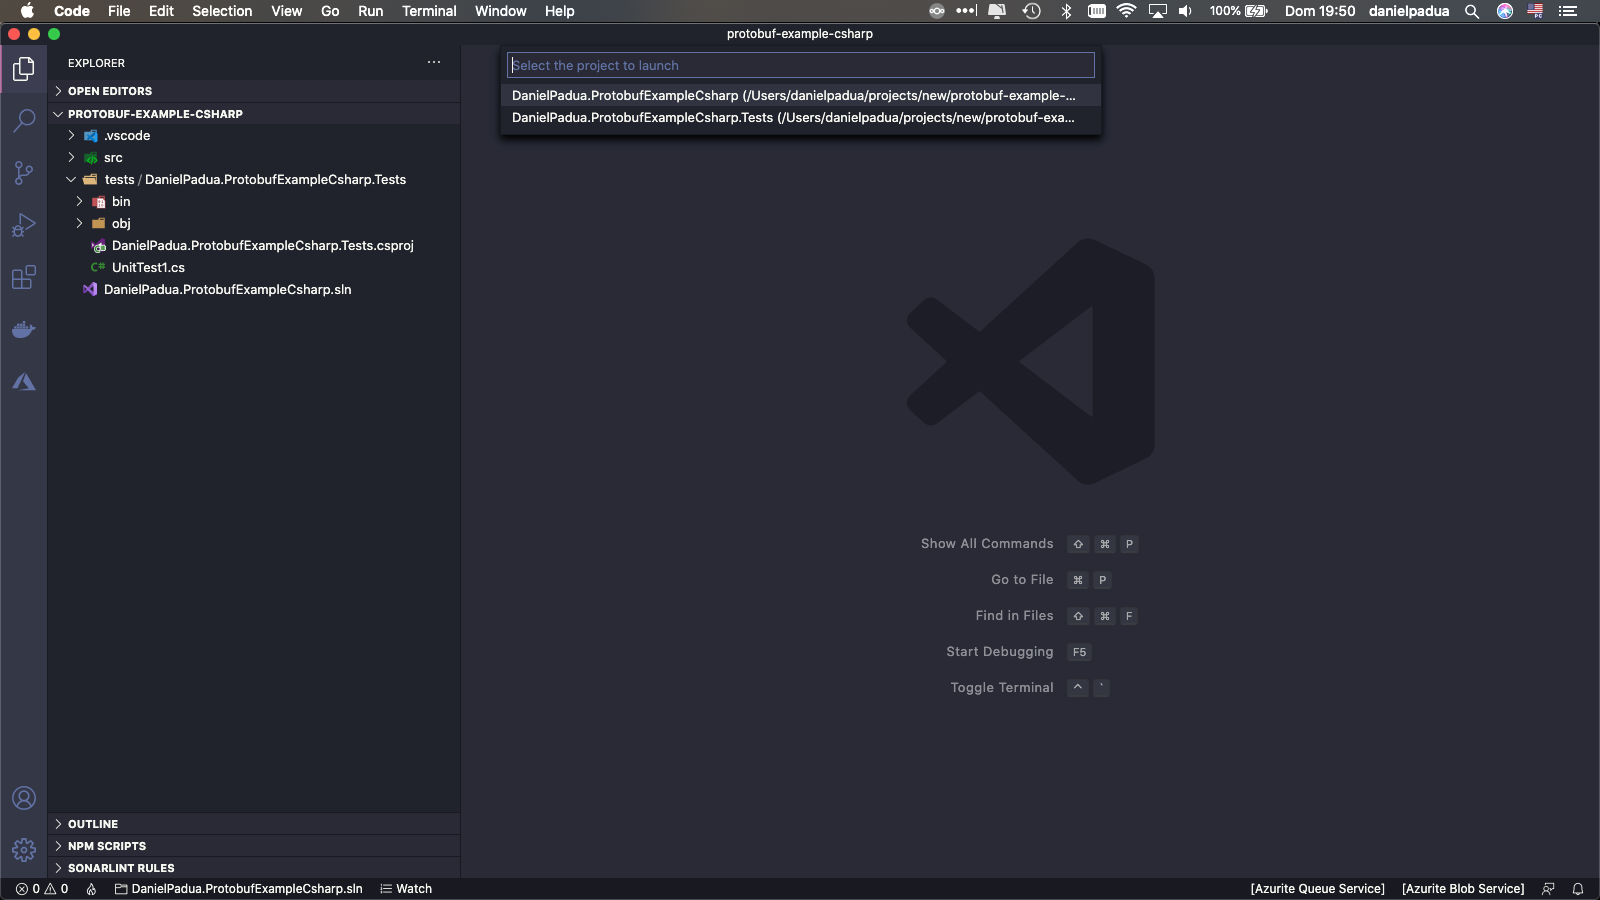 Choose the project to generate the assets
Open terminal again at the src/DanielPadua.ProtobufExampleCsharp level, and run:
1
dotnet add package Grpc.AspNetCore
Now let’s include .proto contracts. Create a directory under main project root named: “Protos” and create the .proto listed in above section:
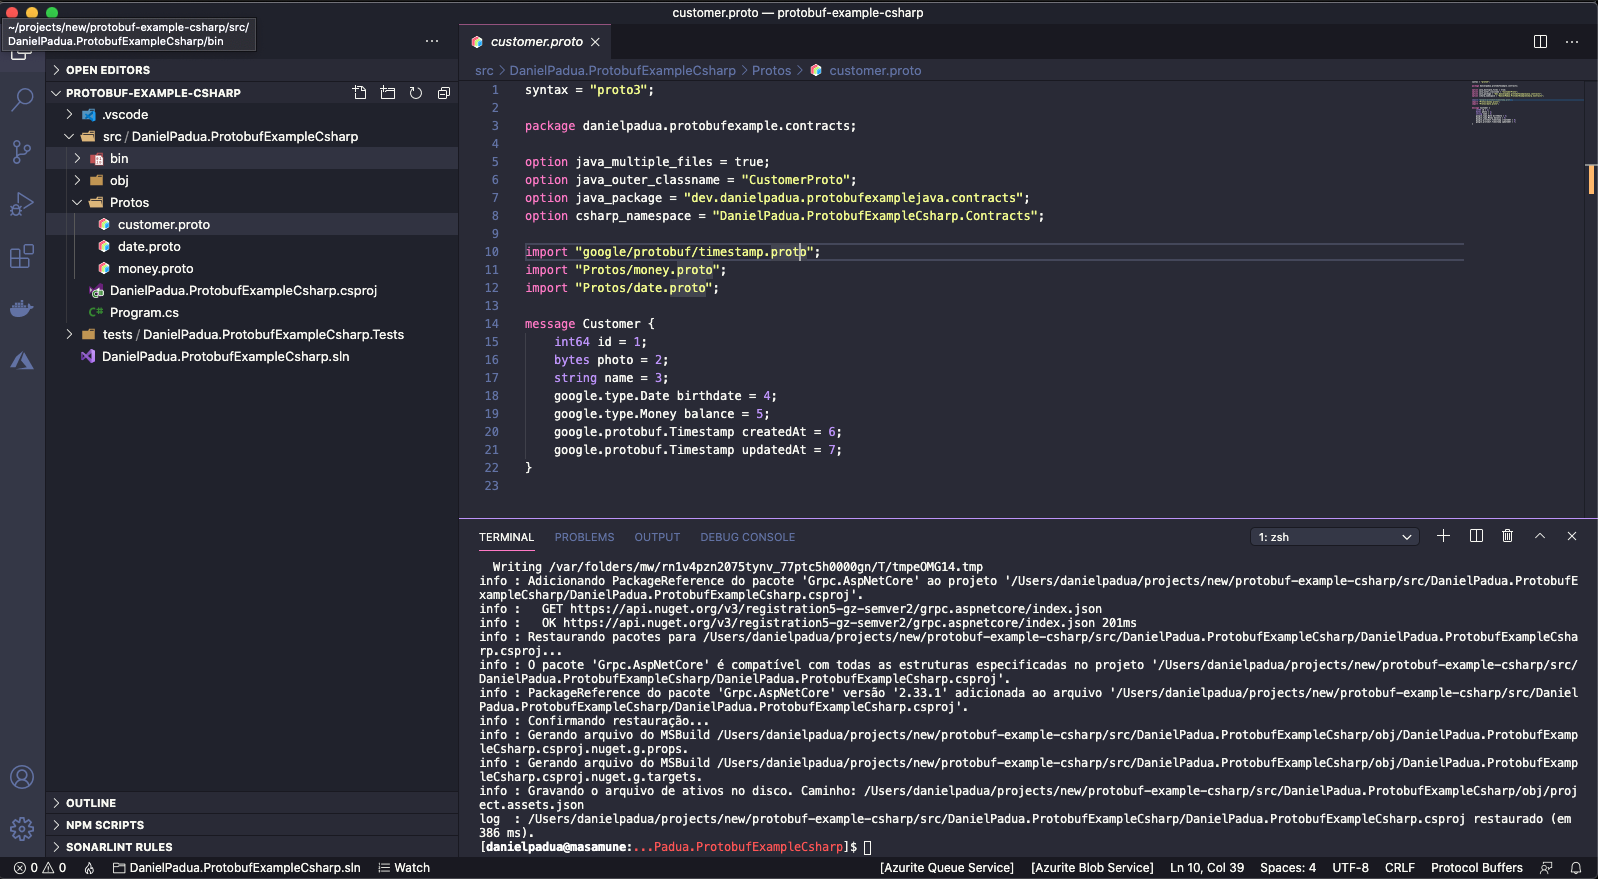 Protobuf files created
Add the .proto files in .csproj for protoc compile when dotnet build runs:
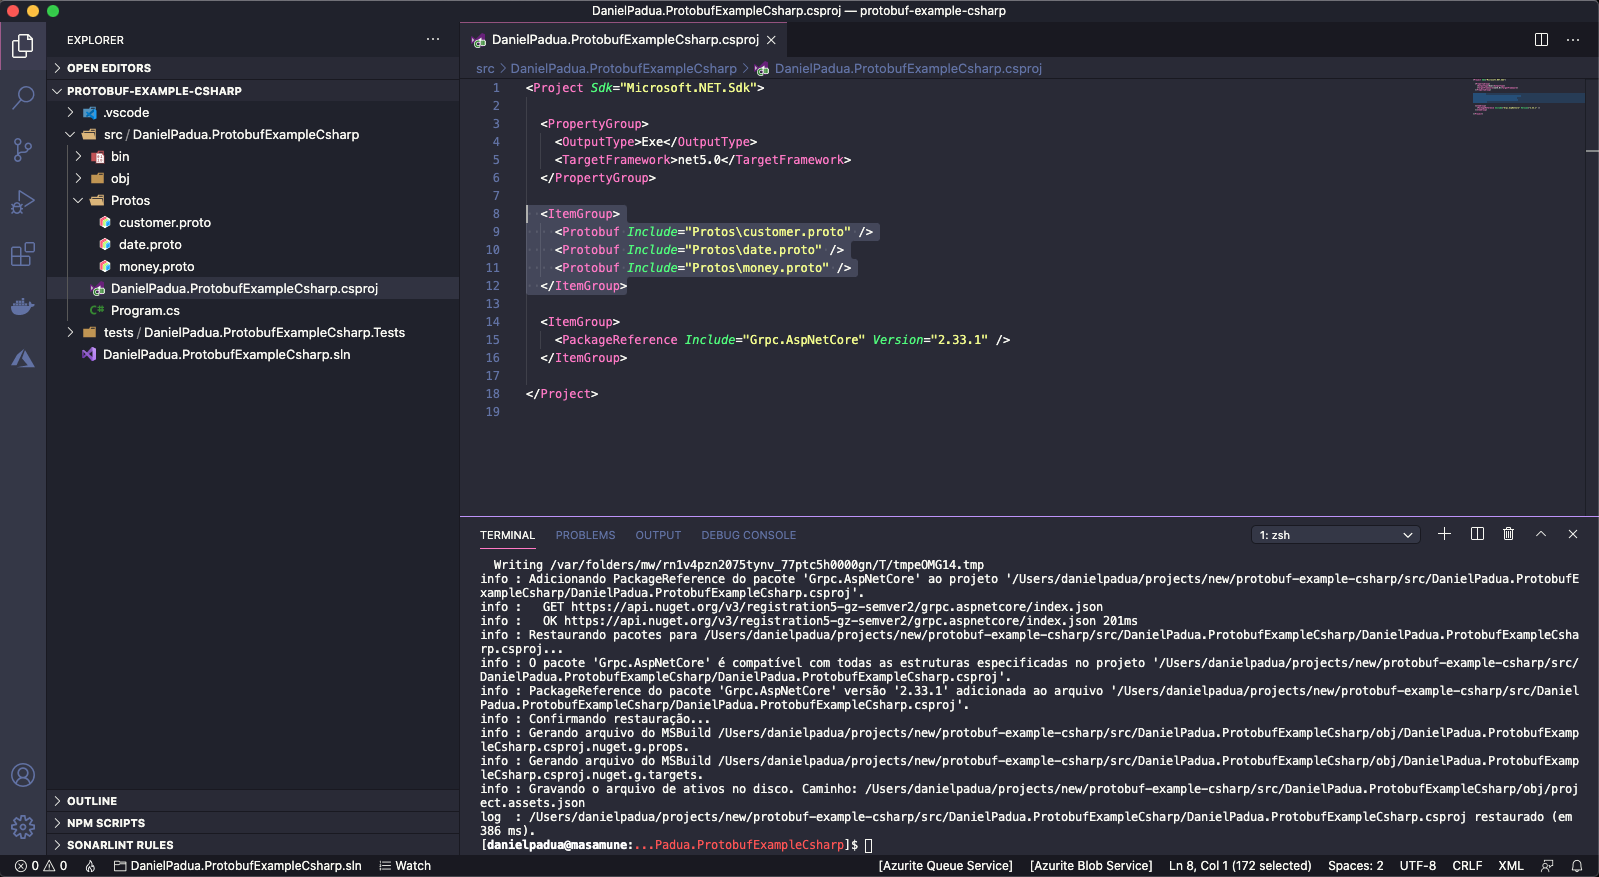 Adding the protobuf files for the plugin to compile
Now let’s build the project to generate C# compiled classes from .proto contracts. In terminal run:
1
dotnet build
A successful output message must look like this:
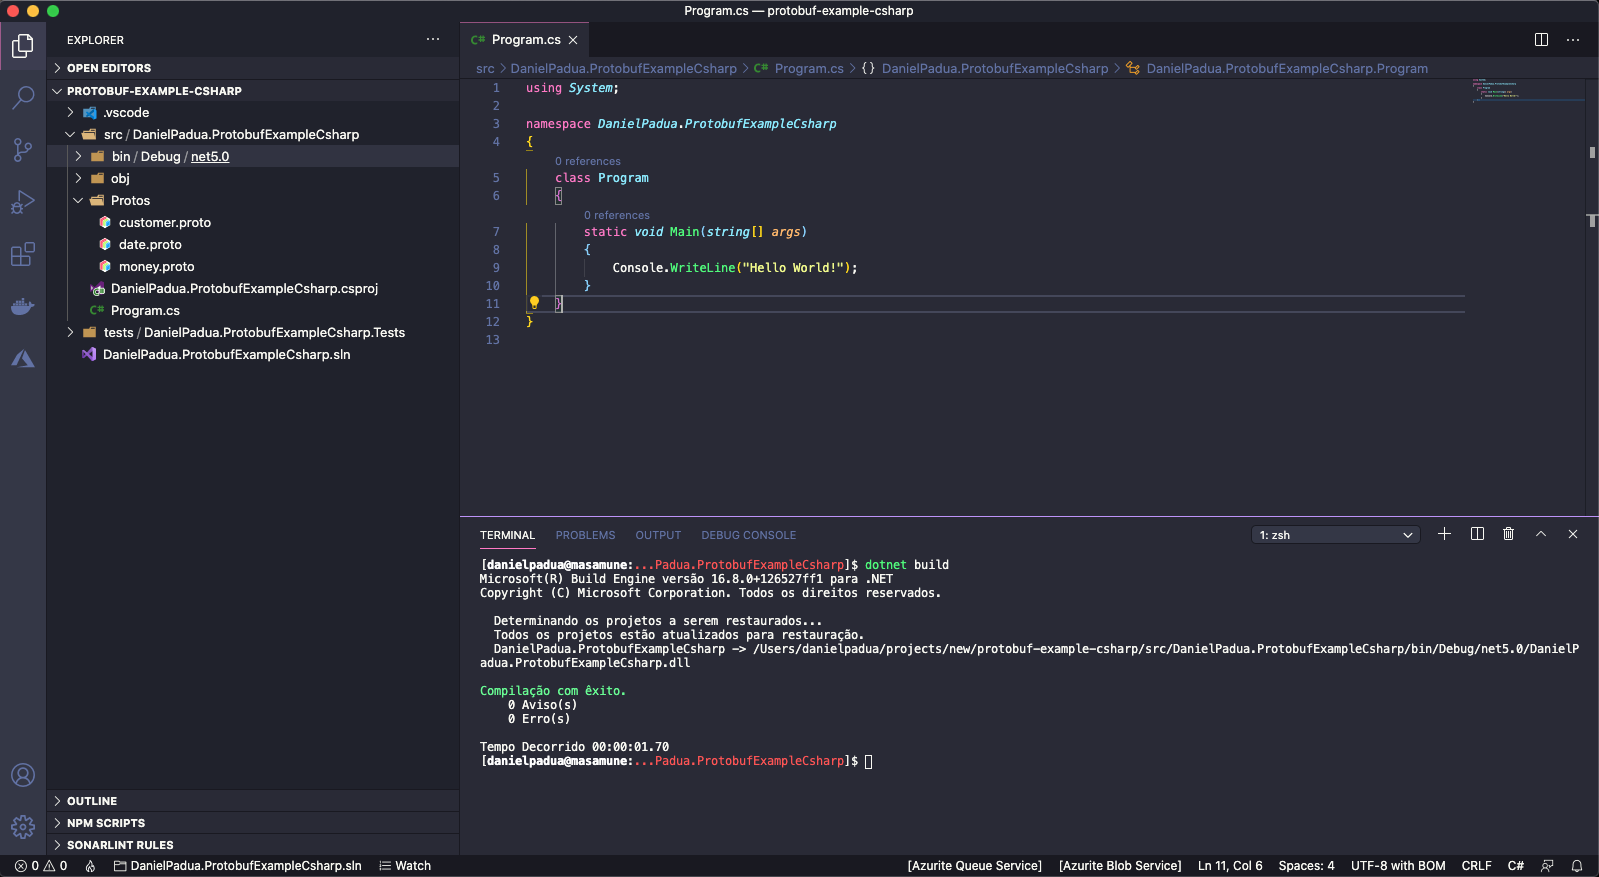 Dotnet build ok
Next, replace the “Hello World” in Main method for the following lines:
1
2
3
4
5
var fullpath = @"/Users/danielpadua/protobuf/protobuf-customer";
using var inputStream = File.OpenRead(fullpath);
Customer c = Customer.Parser.ParseFrom(inputStream);
Console.WriteLine("Customer from protobuf-example-java:");
Console.WriteLine(c.ToString());
Now you will have to import Contracts namespace, press ctrl+. (windows, linux) or cmd+. (macOs) to open autocomplete, and the import option will appear:
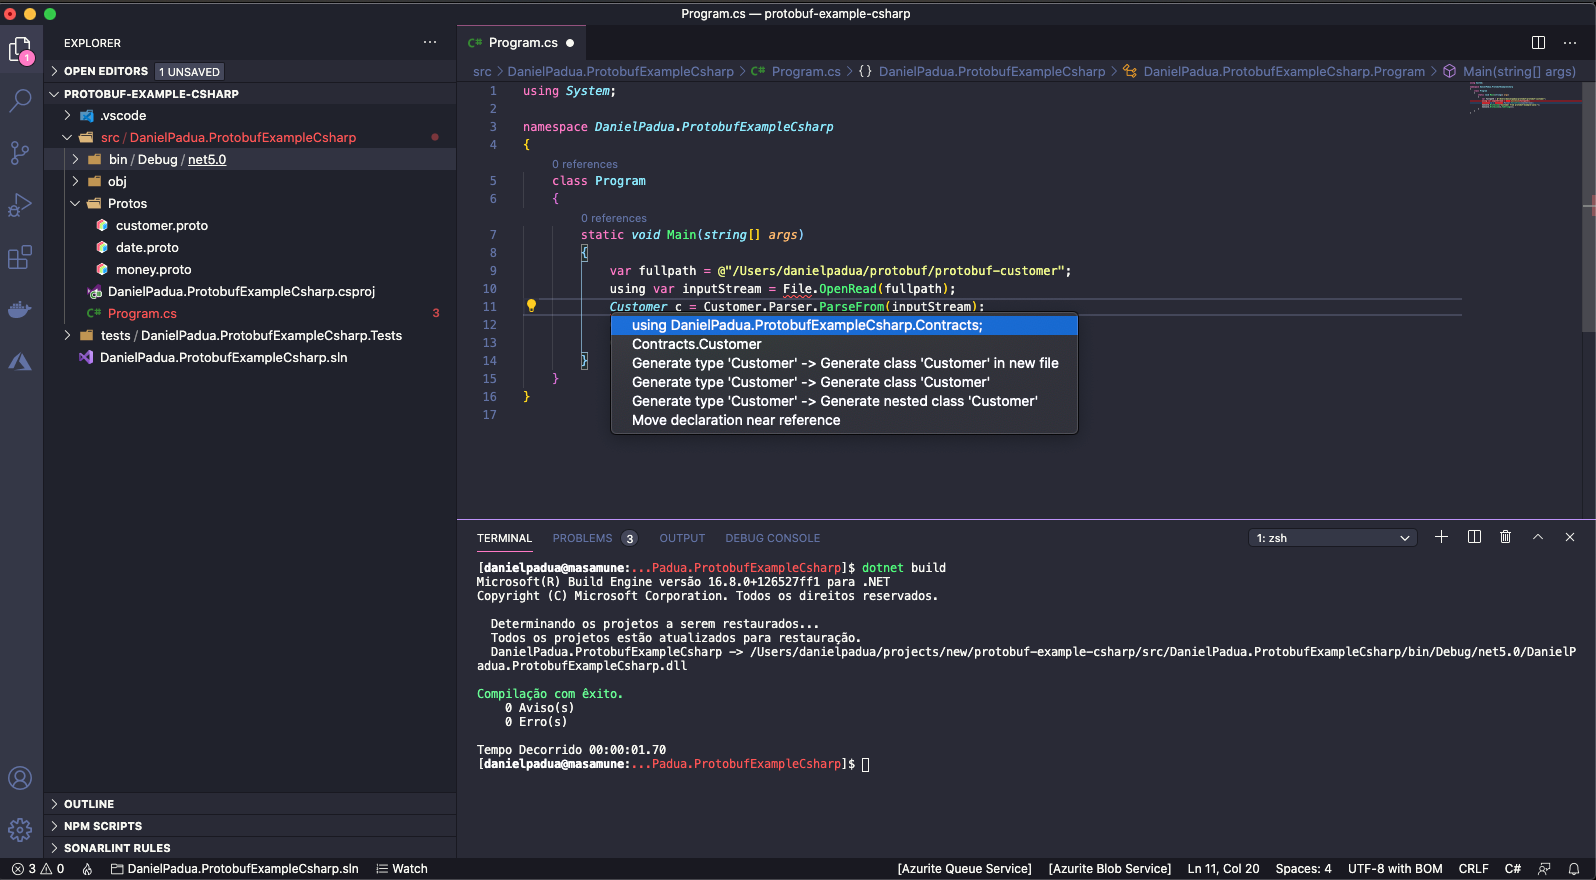 Intellisense and protobuf code generation working
If it does not appear, try to restart Omnisharp using: ctrl+shift+p (windows, linux) or cmd+shift+p (macOs), type: restart omnisharpand hit enter:
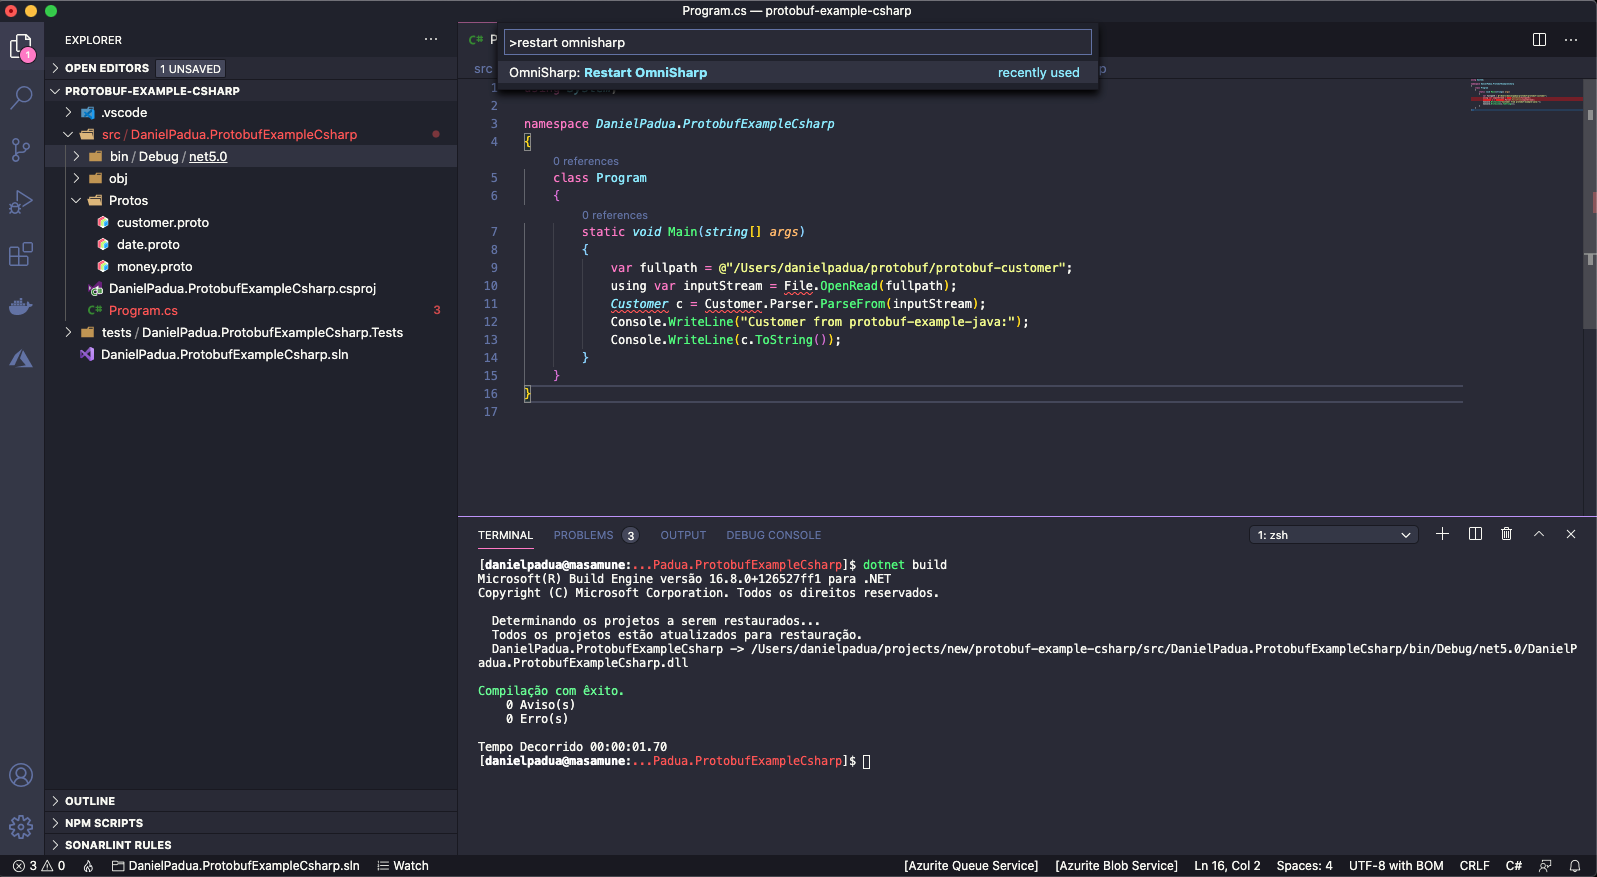 Wait for a moment then try to import again.
Sadly the protobuf compiler and Omnisharp integration is not perfect, but it works.
Make sure you are reading the same directory and file that java generate the file, and then run the C# console application by hitting run button (if you configured run/debug assets correctly) or simply by running a: dotnet run being at main project root directory:
 Running from terminal
 Running from Visual Studio Code
And we did it, received and interpreted a protobuf serialized message generated by a Java application in a C# application.
Conclusion
Protobuf was made to be faster, lighter hence better performing than other protocols. So, do a quick search like: “protobuf vs json performance” or other, there are tons of benchmarks and success cases.
In this article I hope to have given a dive in for those who, like me some time ago never even heard of protobuf and always sticked to JSON and XML.
See you soon!